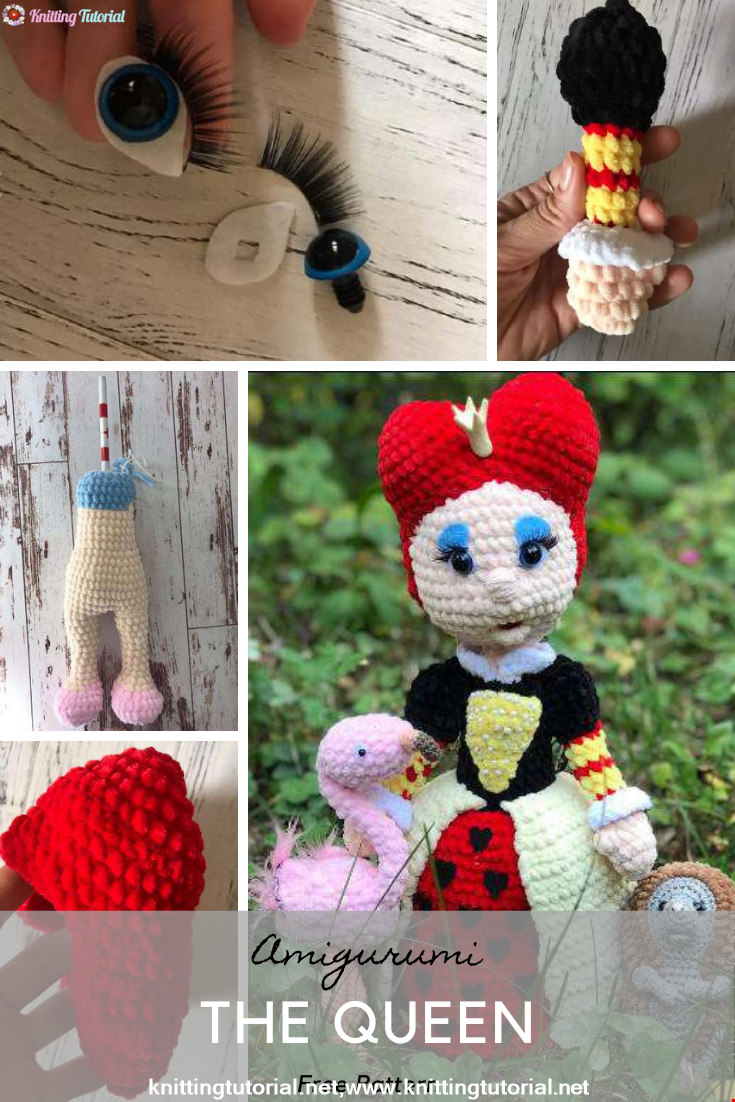
Amigurumi The Queen Crochet Pattern
7 October 2020, 14:38 1256
MK Korolev
Author – Yulia Tikhonova
August 2020
FREE DESCRIPTION
Materials for the Queen
Dolce yarn beige, red, black, yellow (2 shades – light and
dark)
1.5 skeins, eyes 1.4, eyelashes, glue, filler, white and pink felt
slightly, black
Legend
KA-ring amigurumi
Pr- increase
Ub-decrease
Ssn – double crochet
V.p.-air loop
We begin to knit from the legs, then we connect them into the body and then we knit to the head
(all one detail)
We start with red
1 row: 6 sc in ka
2 row: 6 ave (12)
3 row: 12 pr (24)
4 row: we knit for the back wall of the loop 24 sbn
5 row: 24 sbn
6 row: 6 kill, 12 sbn (18)
7 row: (change the color here to beige) (1 sbn, ub) * 6 (12)
8 row: 1 sbn, 2 kill, 7 sbn (10)
9-13 row: 10 sc
14 row: 1 pr, 9 sbn (11)
15 row: 2 sbn, pr, 8 sbn (12)
16 row: 4 sbn, pr, 7 sbn (13)
17 row: 6 sbn, pr, 6 sbn (14)
18 row: 8 sc, pr, 5 sc (15)
We knit the second leg, connect them – make sure that the connection of the legs is
in the middle of the inner part, if necessary, then knit a few sc to
specified place
19 row: we collect 3 VP and connect the legs, we knit 15 sb on one leg, 3 sb
on VP, 15 SBN on the second leg, 3 SBN on VP, the marker is now the beginning of the row here
20-24 row: 36 sc
25 row: (4 PRS, UB) * 6 (30)
26 row: 30 sbn
27 row: (8 PRS, UB) * 3 (27)
28 row: change color to black
29 row: 27 sc
30 row: (7 PRS, UB) * 3 (24)
31-33 row: 24 sbn
To keep the head from dangling, fill the part and insert into the center of the body
pencil, you can wrap it with plaster
34 row: 24 sc
35-36 row 24 sbn
37 row: (2sbn, ub) * 6 (18)
38 row: (4 PRS, UB) * 3 (15)
39 row: (change color to beige) (3 sbn, ub) * 3 (12)
40 row: (2 sbn, ub) * 3 (9)
41 row: 9 sc
42 row: 9 ave (18)
43 row: (1 sbn, pr) * 9 (27)
44 row: (2 sbn, pr) * 9 (36)
45 row: (5 sbn, pr) * 6 (42)
46-54 row: 42 PRS
55 row: (5 sbn, ub) * 6 (36)
56 row: (2 PRS, UB) * 9 (27)
57 row: (1 sbn, ub) * 9 (18)
58 row: (1 sbn, ub) * 6 (12)
59 row: 6 kill
Attach the thread in the color of the dress to the 28th row and knit 1 row: 27 sb
2nd row: (8 sbn, pr) * 3 (30)
3 row: (1 sbn, pr) * 15 (45)
4th row: (4 sbn, pr) * 9 (54)
Knit a dress of the desired length 54 sb in a circle
For the queen – long to the shoes
Attach the yellow top hem with a yellow thread over the row,
from which the main hem was knitted
We attach the thread so that 1 free column remains in the center
We knit in rotary rows – at the beginning of each runway row
1st row: 26 PRS
2 row: 12 sc, 2 pr, 12 sc (28)
3rd row: (6 sbn, pr) * 4 (32)
4 row: (1 sbn, pr) * 16 (48)
5 row: (11, pr) * 4 (52)
We knit to the length of the dress
Hand for the Queen
We start with beige
1 row: 6 sc in ka
2nd row: 1 sbn, pr (9)
3 PRS: 2 PRS, PR (12)
4th row: 12 sbn
5 row: a magnificent column (4 pssn (half-column with a crochet in one loop) in
one loop) – finger, 11 sbn
6 row: dec, 2 sc, dec, 2 sc, dec, 2 sc (9)
7 row: change to red 9 sbn
8 row: change to yellow 9 sbn
9 row: 9 sc
10 row: change to red 9 sbn
11 row: change to yellow – 9 sbn
12 row: 9 sc
13 row: change to red 9 sbn
14 row: change to black 9 pr (18)
15-17 row: 18 sbn
18 row: (1 sbn, ub) * 6 (12)
19 row: 6 kill
Sleeve binding, attach the white thread to the 7th row, knit 9 sbn
2nd row: 9 ave (18)
3 row: 1 sbn, pr) * 6 (24)
Yellow triangle
1 row: 2 VP, knit from the second pr (2)
2nd row: 2 sbn
3 row: 2 ave (4)
4th row: 4 sbn
5 row: pr, 2 sbn, pr (6)
6-7 row: 6 sbn
Red wig
We knit 2 parts
1 row: 6 sc in ka
2 row: 6 ave (12)
3 row: (1 sbn, pr) * 6 (18)
4th row: (2 sbn, pr) * 6 (24)
5 row: (3 sbn, pr) * 3 (30)
We connect them ss
1 row: We knit 30 sc in one piece and 30 sc in the second, put a marker.
2 row: We knit 3 sbn for both walls of parts, we knit further 30 sb, ss,
turn, unfold knitting – 6 sc, ss, unfold knitting back
30 PRS, marker (new, remove the old) (54)
3-4 row: 54 sbn
5 row: we knit an incomplete row of 13 sbn, runway turn
6 row: 26 sbn
7-12 row: 26 PRS
13 row: kill, 22 sbn, kill (24)
14 row: kill, 20, kill (22)
Now you need to tie the wig around the edge – making decreases every 2 loops,
otherwise it will hang on your head
Collar
Attach white thread to row 38 and knit 1 row: 15 sbn,
2nd row: 15 pr
3rd row: 30 sbn
Assembly and design
Sew on handles 36-38 row
Eyes
Eyes 50 -51 row distance between 5 sbn
Nose 49 -50 row
We make a tightening
We introduce the needle in the center of the 45-46 row, and take it to the right eye, then take it away
down again, from below we take the needle to the left eye.
In the groove from below we sew the mouth 6 sbn in ka (first glue the tongue
from felt)
Cut out the blue parts from felt and fasten at the base of the eye from above
We fasten the wig, sew along the edge, stuffing the tubercles
Sew on a yellow triangle, you can decorate it with beads, glue
a crown made of felt or polymer clay.
The queen is ready
Category Popular Posts
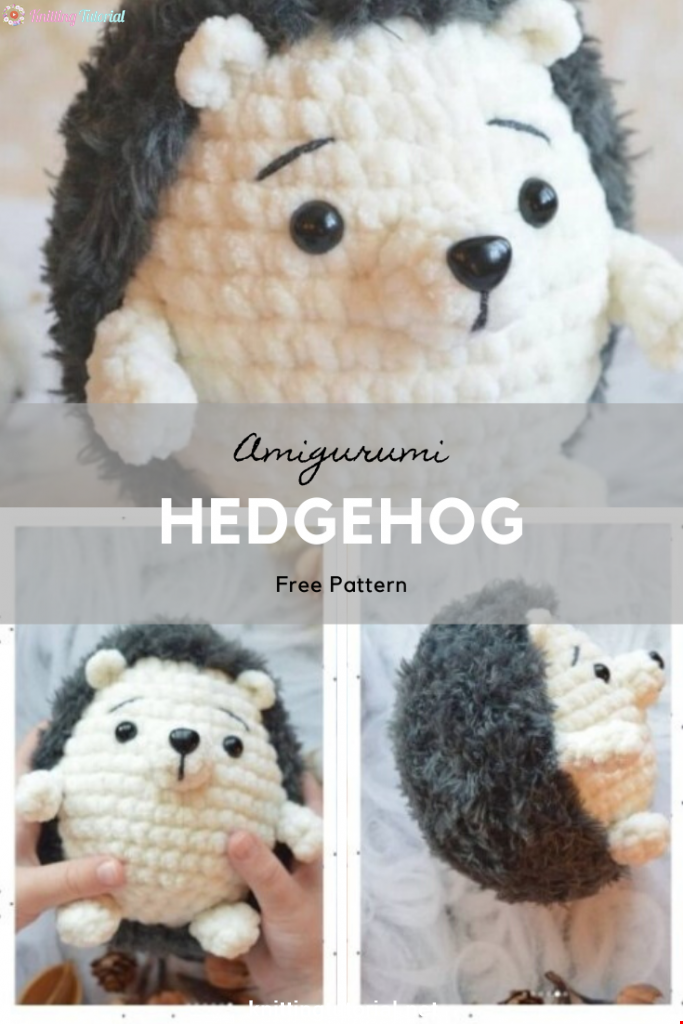
Amigurumi Hedgehog Free Pattern
12 October 2020, 09:52 11498
Making Amigurumi Spiderman
27 January 2022, 20:58 2015
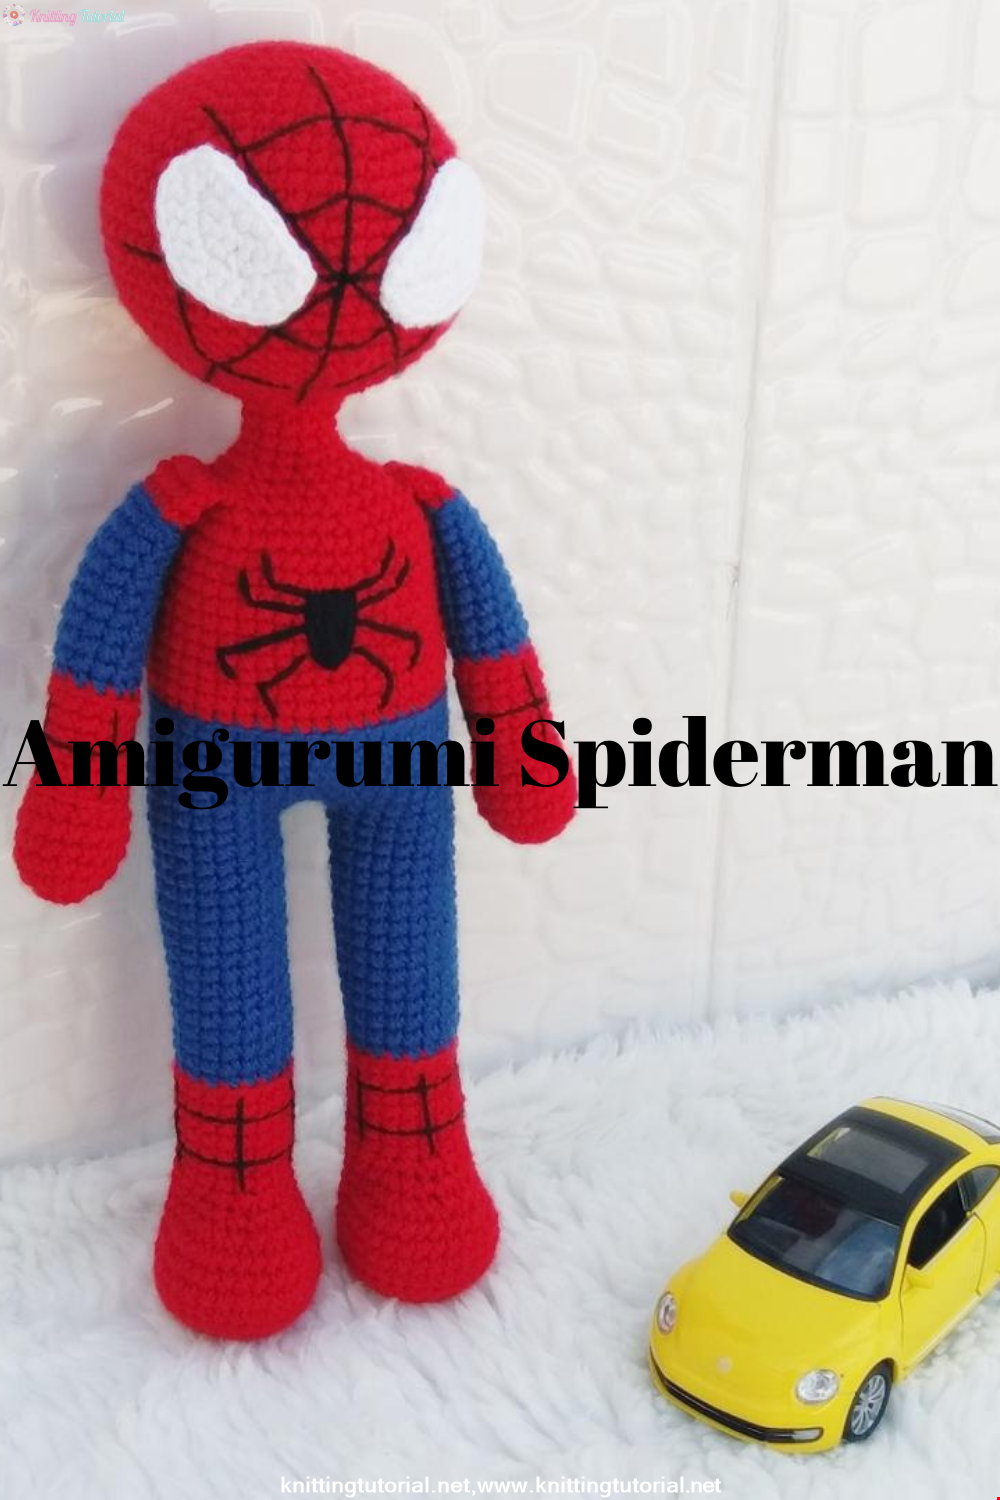
Hello, Are you ready to knit Spiderman, Spider-Man, the children's favorite cartoon character? You will be able to knit easily with detailed explanation. Let's start!
Read More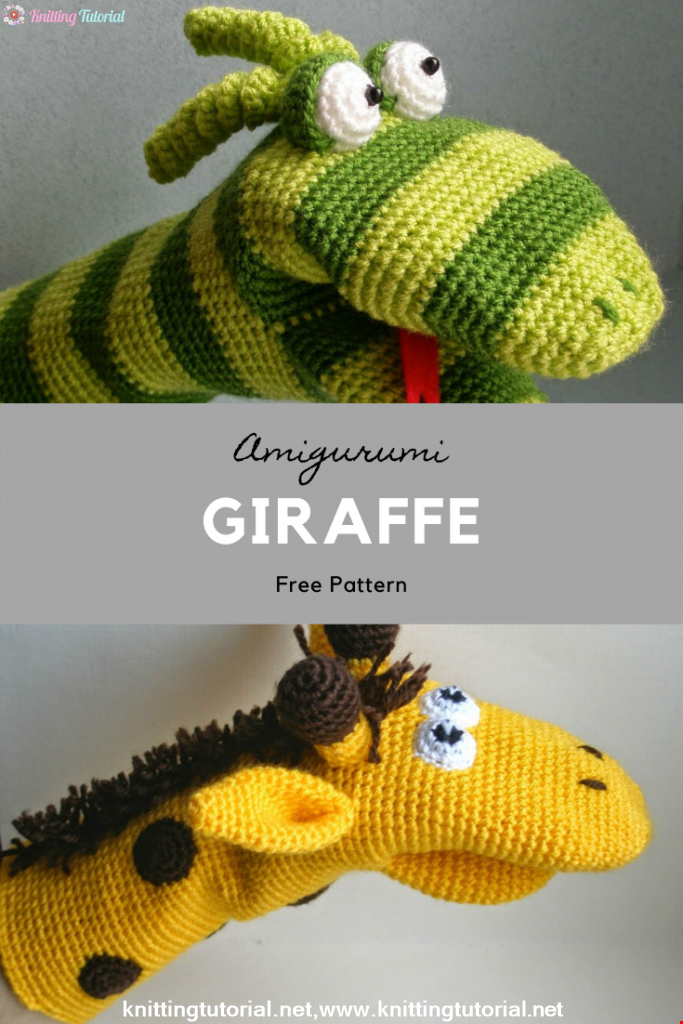
Amigurumi Princess Mononoke Crochet Pattern
12 December 2020, 21:20 944
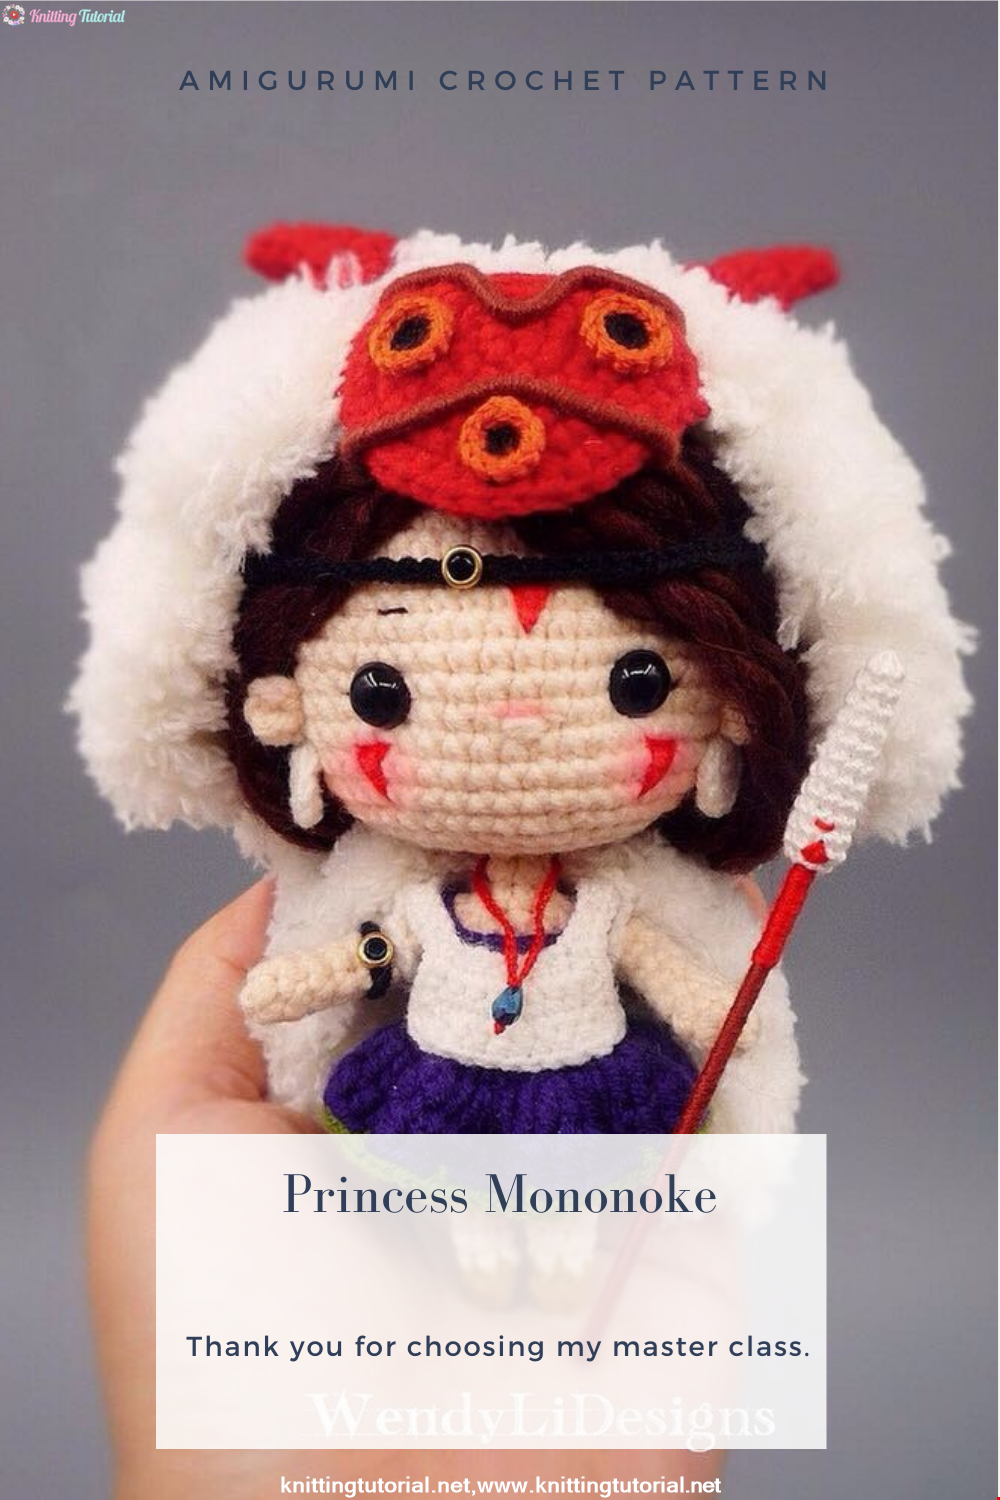
Free Crochet Princess Mononoke workshop by Wendy Li. The knitted girl is the hero of the cartoon by Hayao Miazaki. From the description of the diagram, you will also learn how to knit: a cape, a cloak, a dress and a mask for a doll.
Read More
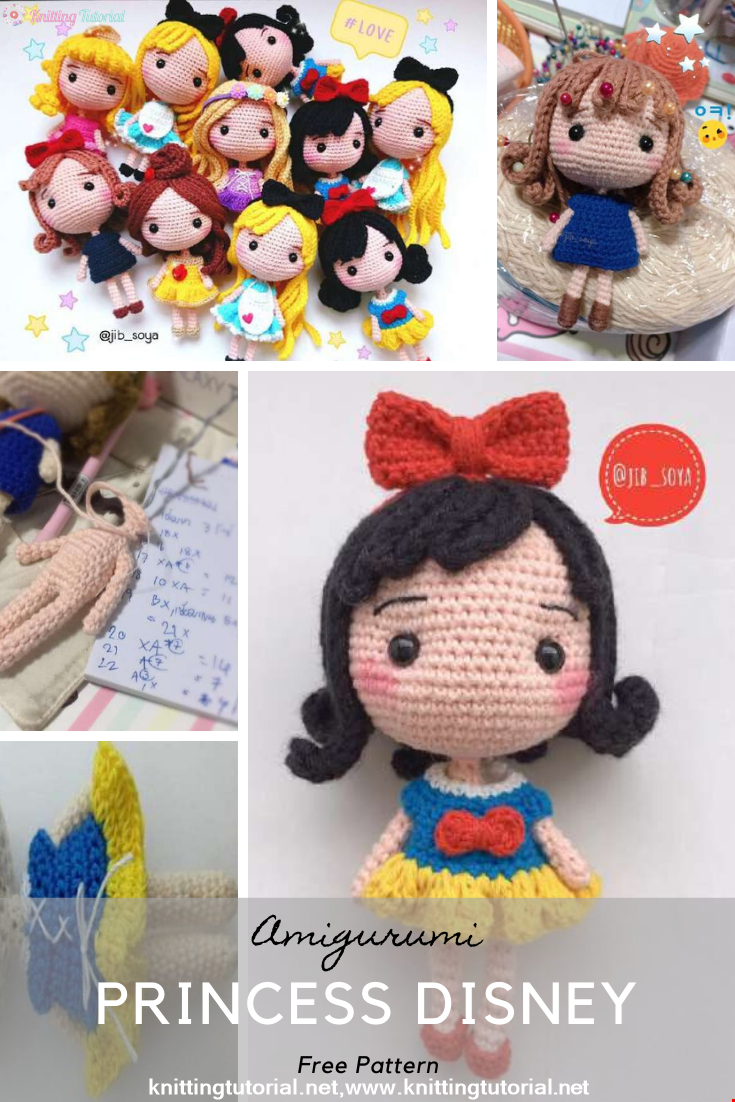
Princess Disney Amigurumi Pattern
8 October 2020, 14:51 5814

Korean Girl in Traditional Dress (Hanbok)
22 September 2020, 11:11 1572

This is the process how I made the amigurumi of Korean Bride in traditional dress Hanbok. Lately I've been watching a lot of Korean dramas and got inspired to make one. I hope you can enjoy the video, and get inspired too!
Read More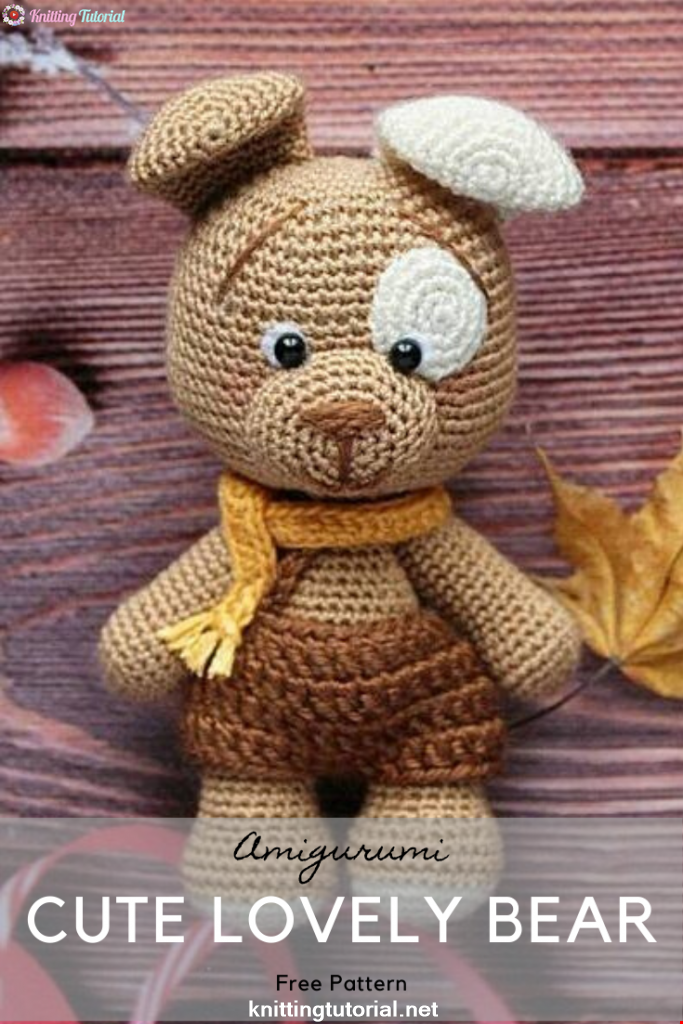
Amigurumi Sweet Giraffe Recipe and Preparation
5 January 2022, 14:55 634
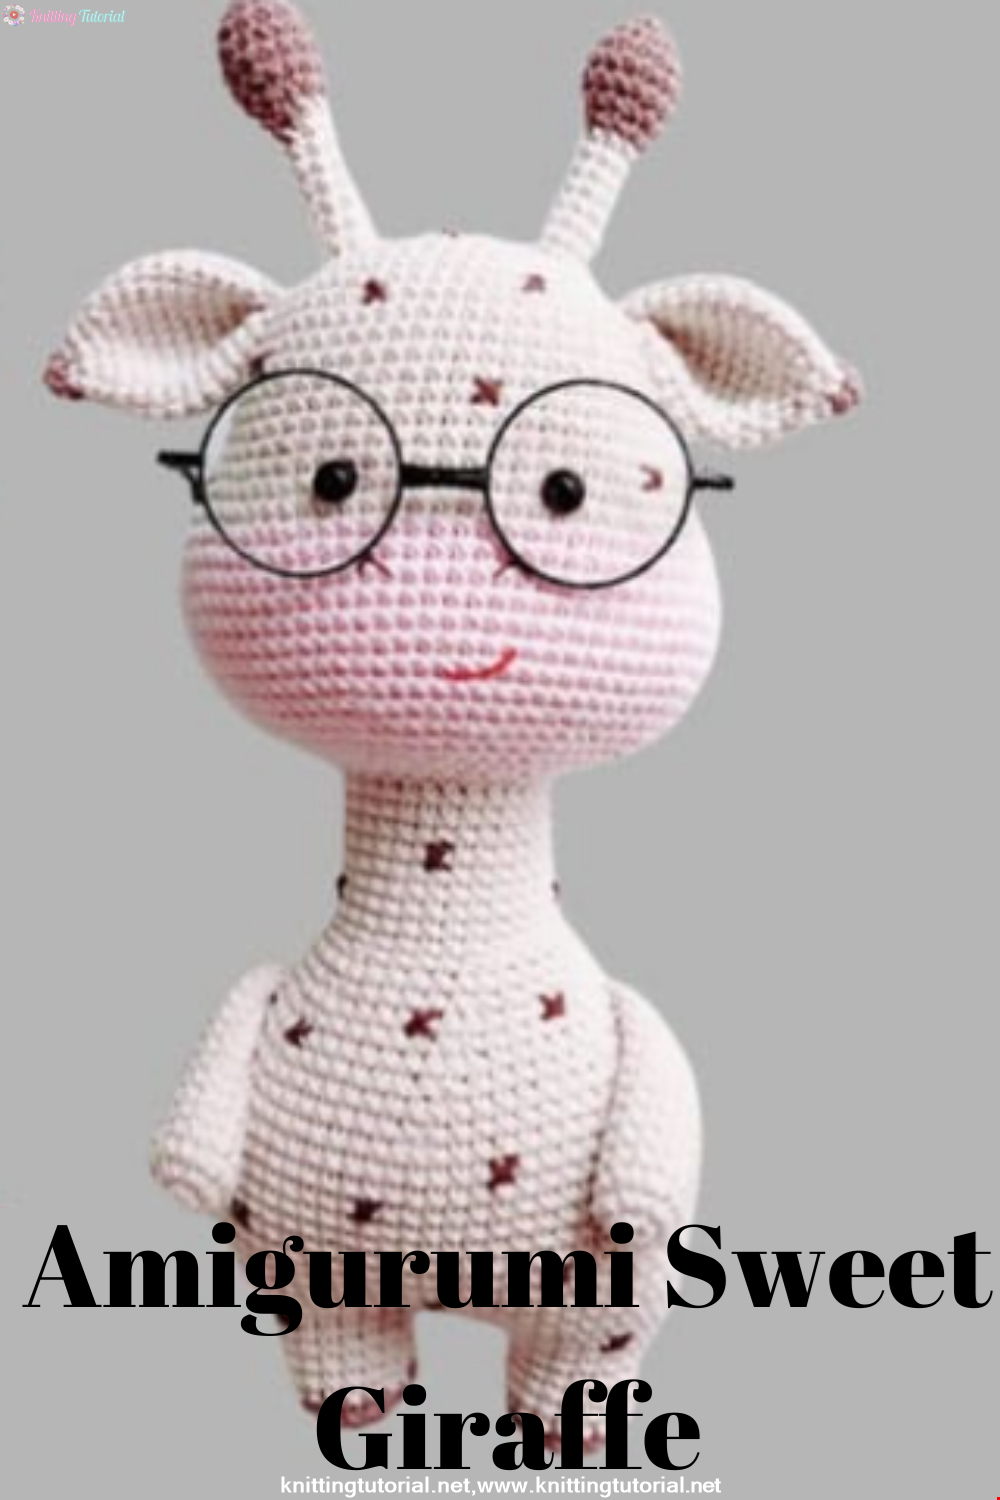
We have come to share with you the most popular model of recent times with the Amigurumi sweet giraffe recipe. I hope it will be an amigurumi animal figure that you like very much and knit with love.
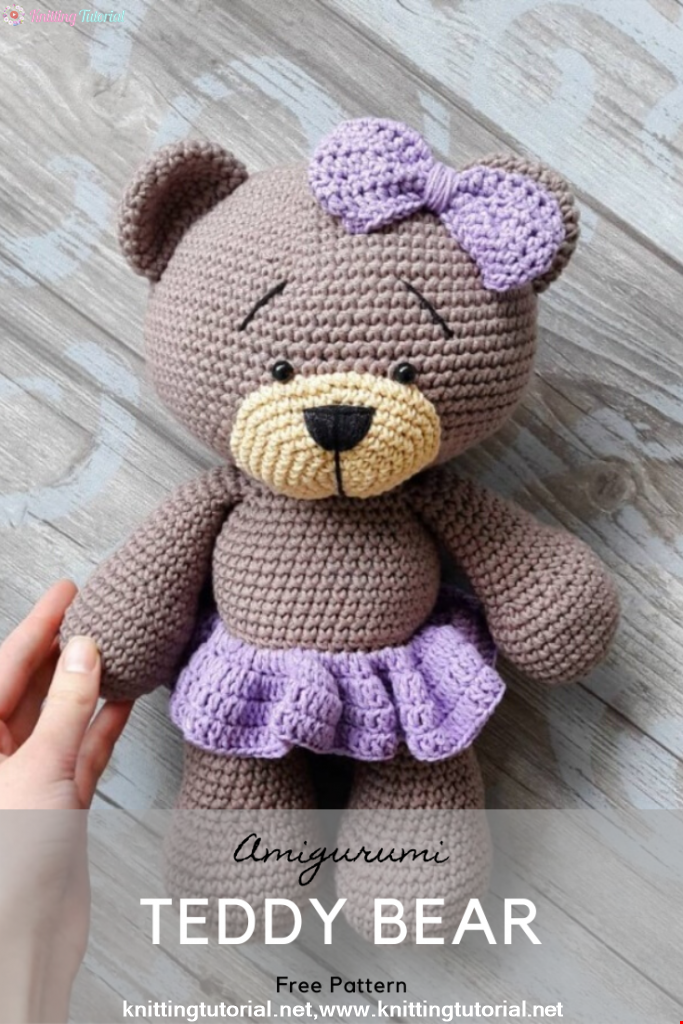
Read MoreLovely Teddy Bear Amigurumi Tutorial
12 October 2020, 10:05 2969