Little Bear Hoodie
27 October 2020, 13:40 687
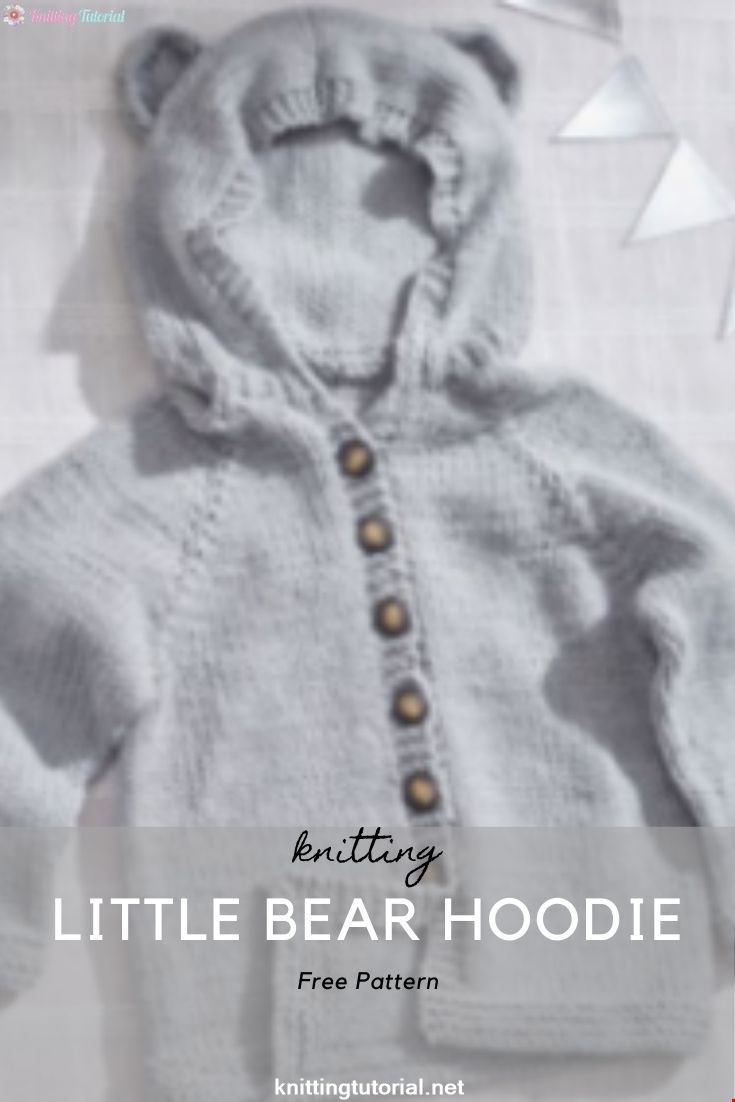
Your sweet little one will be as huggable as can be in this cozy hoodie. It takes just one big ball of Bunches of Hugs to knit this adorable cardigan sweater with teddy bear ears.
GAUGE: 21 sts = 5″ [12.5 cm]; 24 rows = 4″ [10 cm], in Stockinette st (knit on right side, purl on wrong side).
CHECK YOUR GAUGE. Use any size needles to obtain the gauge.
Directions are for size 6 months. Changes for sizes 12 months, and 18 months are in parentheses.

Finished Chest: 20 (22, 24)” [51 (56, 61) cm]
Finished Length: 11 (13½, 16)” [28 (34.5, 40.5) cm], not including hood
Notes
1. Sweater is worked in one piece from the neck downwards. Piece is divided at underarms and body is then worked back and forth in rows to lower edge.
2. Sleeve stitches are placed on double pointed needles and worked in rounds to cuff.
3. Stitches are picked up around the neck edge and hood is worked back and forth in rows from the neck upwards.
4. Ears are worked separately, back and forth in rows, and sewn to hood.
5. Circular needle is used to accommodate stitches and for ease when working along curves. Work back and forth in rows on circular needle as if working with straight needles.
Special Stitches
kfb (Knit into front and back) = Knit next stitch but do not remove from needle, knit into back loop of same stitch and remove from needle – 1 st increased.
ssk (slip, slip, knit) = Slip next 2 stitches, one at a time, as if to knit to right needle, insert point of left needle through front of stitches, knit these sts together through back loop – 1 st decreased.
Special Techniques
3-Needle bind off = Hold needles of stitches to be seamed parallel and with right sides together, with 3rd needle
knit together first stitch from each needle, *knit together next stitch from each needle, pass first stitch over 2nd
stitch and off right needle; repeat from * until all stitches have been knit from the 2 parallel needles and only one stitch remains on the right needle. Fasten off.
Backward loop cast on = *Carry the working yarn from right to left behind your thumb or forefinger and then to
the front and clasp it lightly in your palm. Insert the tip of the right needle from left to right under the front strand,
forming a loop on the needle. Remove your finger from the loop. Tighten the loop on the needle; repeat from * until
desired number of stitches have been cast on.
SWEATER
Yoke
Beginning at neck edge with circular needle, cast on 2 sts for left front, place marker, cast on 7 sts for left sleeve,
place marker, cast on 12 sts for back, place marker, cast on 7 sts for right sleeve, place marker, cast on 2 sts for
right front (for a total of 30 sts and 4 markers on needle).
Row 1 (wrong side): Purl, slipping markers as you come to them.
Row 2 (increase row): [Kfb] twice, slip marker, *kfb, knit to 1 st before next marker, kfb, slip marker; repeat from * 2
more times, [kfb] twice—40 sts
Row 3: Purl, slipping markers as you
come to them.
Row 4 (increase row): *Kfb, knit to 1 st before next marker, kfb, slip marker; repeat from * 3 more times, kfb, knit to
last st, kfb—50 sts.
Row 5: Cast on 4 sts for right front band, purl to end of row, slipping markers as you come them—54 sts.
Row 6: Cast on 4 sts for left front band, knit to 1 st before first marker, kfb, slip marker, *kfb, knit to 1 st before next
marker, kfb, slip marker; repeat from * 2 more times, kfb, knit to end of row—66 sts.
Note: Continue to slip markers as you come to them, unless otherwise instructed.
Row 7: K4, p to last 4 sts, k4.
Row 8 (increase row): Knit to 1 st before first marker, kfb, slip marker, *kfb, knit to 1 st before next marker, kfb, slip marker; repeat from * 2 more times, kfb, knit to end of row—74 sts.
Row 9: K4, p to last 4 sts, k4.
Row 10 (increase row and buttonhole row): Knit to 1 st before first marker, kfb, slip marker, *kfb, knit to 1 st before next marker, kfb, slip marker; repeat from * 2 more times, kfb, knit to last 3 sts, yarn over, k2tog, k1—82 sts.
Row 11: K4, p to last 4 sts, k4.
Row 12: Repeat Row 8—90 sts.
Rows 13–18: Repeat Rows 11 and 12 for 3 more times—114 sts.
Row 19: K4, p to last 4 sts, k4.
Row 20: Repeat Row 10—122 sts.
Rows 21–29: Repeat Rows 11–19—154 sts. At this point, you will have 22 sts for each front, 35 sts for each sleeve, and
40 sts for the back.
Size 6 months Only:
Notes:
1. Use backward loop cast-on to cast on underarm stitches (as instructed in dividing row).
2. At this point, you will have 22 sts for each front, 35 sts for each sleeve, and 40 sts for the back. Row 30 (dividing row and buttonhole row – right side): Knit to first marker, remove marker, place next 35 sts on a holder for left sleeve, remove marker, cast on 4 sts for underarm, knit next 40 sts, remove marker, cast on 4 sts for underarm, place next 35 sts on a holder for right sleeve, remove marker, knit to last 3 sts, yarn over, k2tog, k1—84 sts remain on needle for body.
Sizes 12 months and 18 months Only:
Rows 30–33 (37): Repeat Rows 10–13 (17)—170 (186) sts.
Notes:
3. Use backward loop cast-on to cast on underarm stitches (as instructed in dividing row).
4. At this point, you will have 24 (26) sts for each front, 39 (43) sts for each sleeve, and 44 (48) sts for the back.
Row 34 (38) (dividing row – right side): Knit to first marker, remove marker, place next 39 (43) sts on a holder for
left sleeve, remove marker, cast on 4 sts for underarm, knit next 44 (48) sts, remove marker, cast on 4 sts for
underarm, place next 39 (43) sts on a holder for right sleeve, remove marker, knit last 24 (26) sts—92 (100) sts remain on needle for body
Body
Keeping first and last 4 sts of every row in Garter st (knit the first and last 4 stitches on every row) for front bands,
continue to work in Stockinette stitch (knit on right side, purl on wrong side) and continue to work a buttonhole
at the end of every 10th row (up to a total of 5 (6, 7) buttonholes) until body measures about 5 (7, 9)” [12.5 (18, 23)
cm] from underarms, end with a wrong side row. Work in Garter st (knit every st of every row) for 8 rows. Bind off on right side.
Sleeves
Place the 35 (39, 43) left sleeve sts on double pointed needles, pick up and k4 sts along underarm placing a stitch marker between the 2nd and 3rd stitch of the underarm for beginning of round—39 (43, 47) sts. Distribute the stitches as evenly as possible over the double pointed needles.
Rounds 1–5: Knit.
Round 6 (decrease round): K2tog, knit to last 2 sts, ssk—37 (41, 45) sts. Repeat Rounds 1–6 for 4 (5, 6) more
times—29 (31, 33) sts.
Next Round: Knit. Repeat last round until sleeve measures about 5 (7, 8)” [12.5 (18, 20.5) cm] from underarm.
Cuff
Round 1: Knit.
Round 2: Purl.
Rounds 3–8: Repeat Rounds 1 and 2 for 3 more times.
Bind off.
Repeat to work right sleeve
Hood
With right side facing and circular needle, pick up and k41 sts along neck edge. Work back and forth in rows as if
working with straight needles.
Row 1: P10, [kfb] 20 times, p11—61 sts.
Row 2: K1, *p1, k1; repeat from * across.
Row 3: P1, *k1, p1; repeat from * across.
Row 4: Repeat Row 2.
Row 5: K4, p10, [kfb] 6 times, p21, [kfb] 6 times, p10, k4—73 sts.
Row 6: Knit.
Row 7: K4, p to last 4 sts, k4.
Repeat Rows 6 and 7 until hood measures about 8″ [20.5 cm] from neck edge, end with a wrong side row.
Distribute 36 sts onto one end of needle and 37 sts onto the other end. Fold hood in half to bring the right side of
stitches together.
Beginning at the front of the hood and working towards the back/fold, use 3-needle bind off to seam top of hood.
EARS (make 2)
With two double pointed needles or circular needle (whichever you prefer), leaving a long beginning tail, cast on 20
sts.
Row 1: Knit.
Row 2: *K2, k2tog, k1; repeat from * across—16 sts.
Row 3: Purl.
Row 4: *K2, k2tog; repeat from * across—12 sts.
Row 5: Purl.
Row 6: *K2tog, k1; repeat from * across—8 sts.
Row 7: Purl.
Row 8: *K2tog; repeat from * across—4 sts.
Cut yarn, leaving a long tail. Thread tail through remaining 4 stitches and remove them from the needle. Pull on
tail to drawn last 4 stitches together and weave in securely. Use beginning tail to sew ear to hood, curving ear into
a crescent shape toward the front as you sew. Repeat or second ear.
FINISHING
Weave in ends. Block as desired. Sew buttons to left front, opposite buttonholes.
ABBREVIATIONS
k = knit; k2tog = knit next 2 sts
together; p = purl; st(s) = stitch(es); * = repeat whatever follows the * as indicated.


Category Popular Posts
Watson Waffle Sweater Cardigan
15 October 2020, 14:38 30474
Korean Girl in Traditional Dress (Hanbok)
22 September 2020, 11:11 1572

This is the process how I made the amigurumi of Korean Bride in traditional dress Hanbok. Lately I've been watching a lot of Korean dramas and got inspired to make one. I hope you can enjoy the video, and get inspired too!
Read More
Y Auger construction
27 January 2022, 21:16 1235
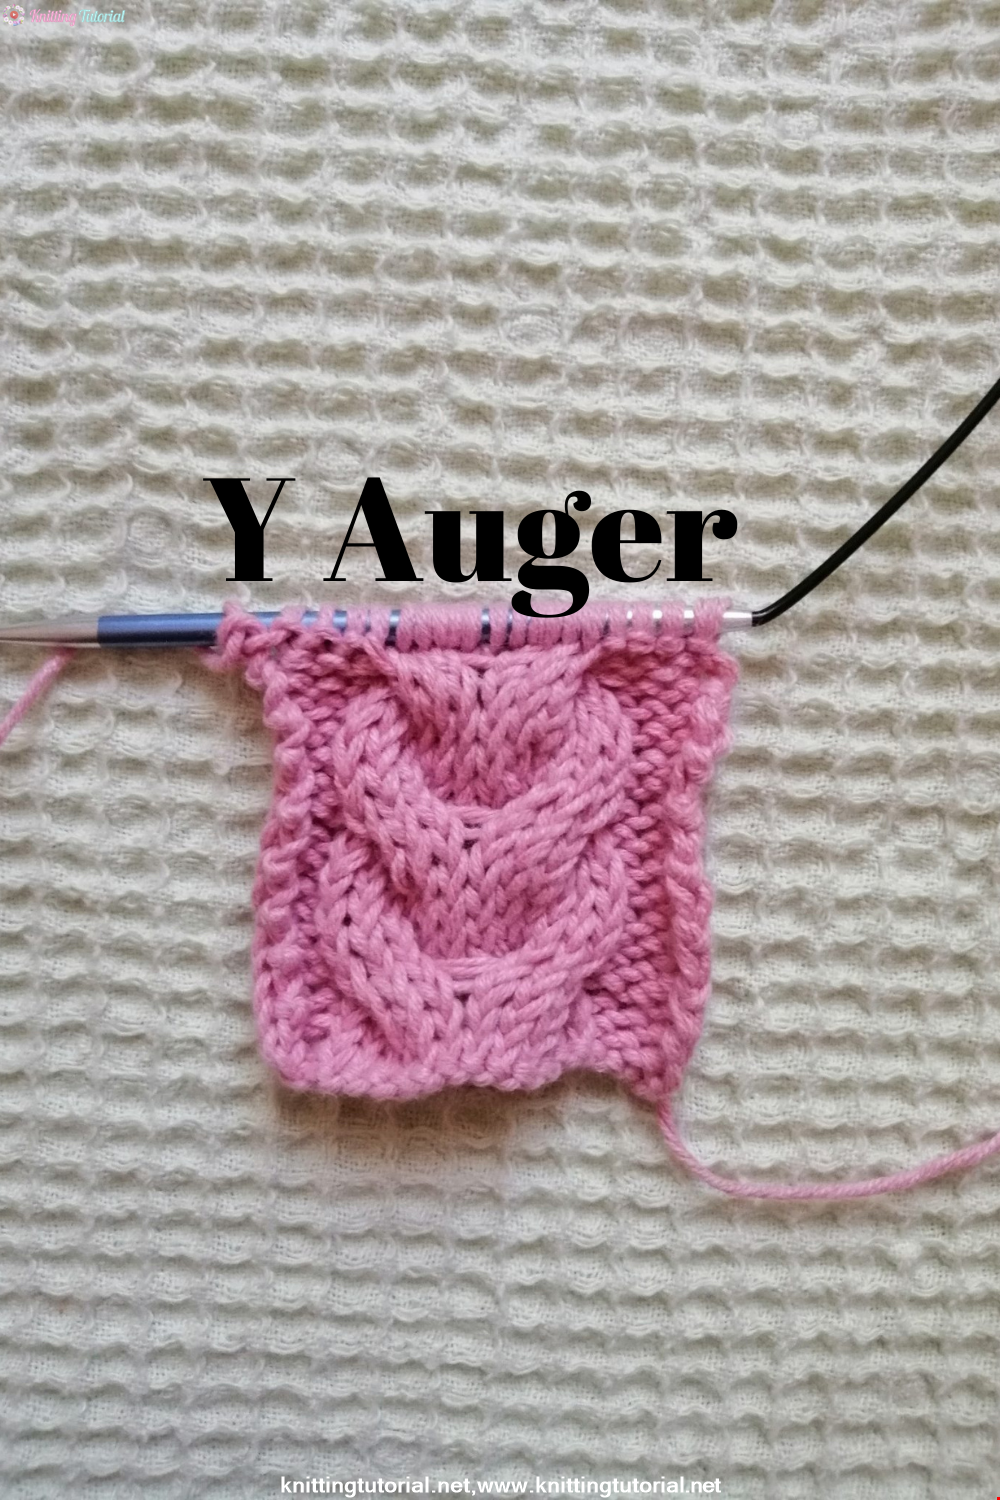
Hello everyone! We have prepared a Y twist model, which is very suitable for vests and cardigans, for you. This model is actually very easy to make! Let's start knitting this beautiful model right now!
Read More
Openwork Baby Cardigan Making
22 January 2022, 11:53 1241
Hello! Today we came to you with the construction of openwork baby cardigan. If you're ready, let's start.
Read More
Amigurumi Rabbit Family Making and Recipe
16 January 2022, 18:14 822
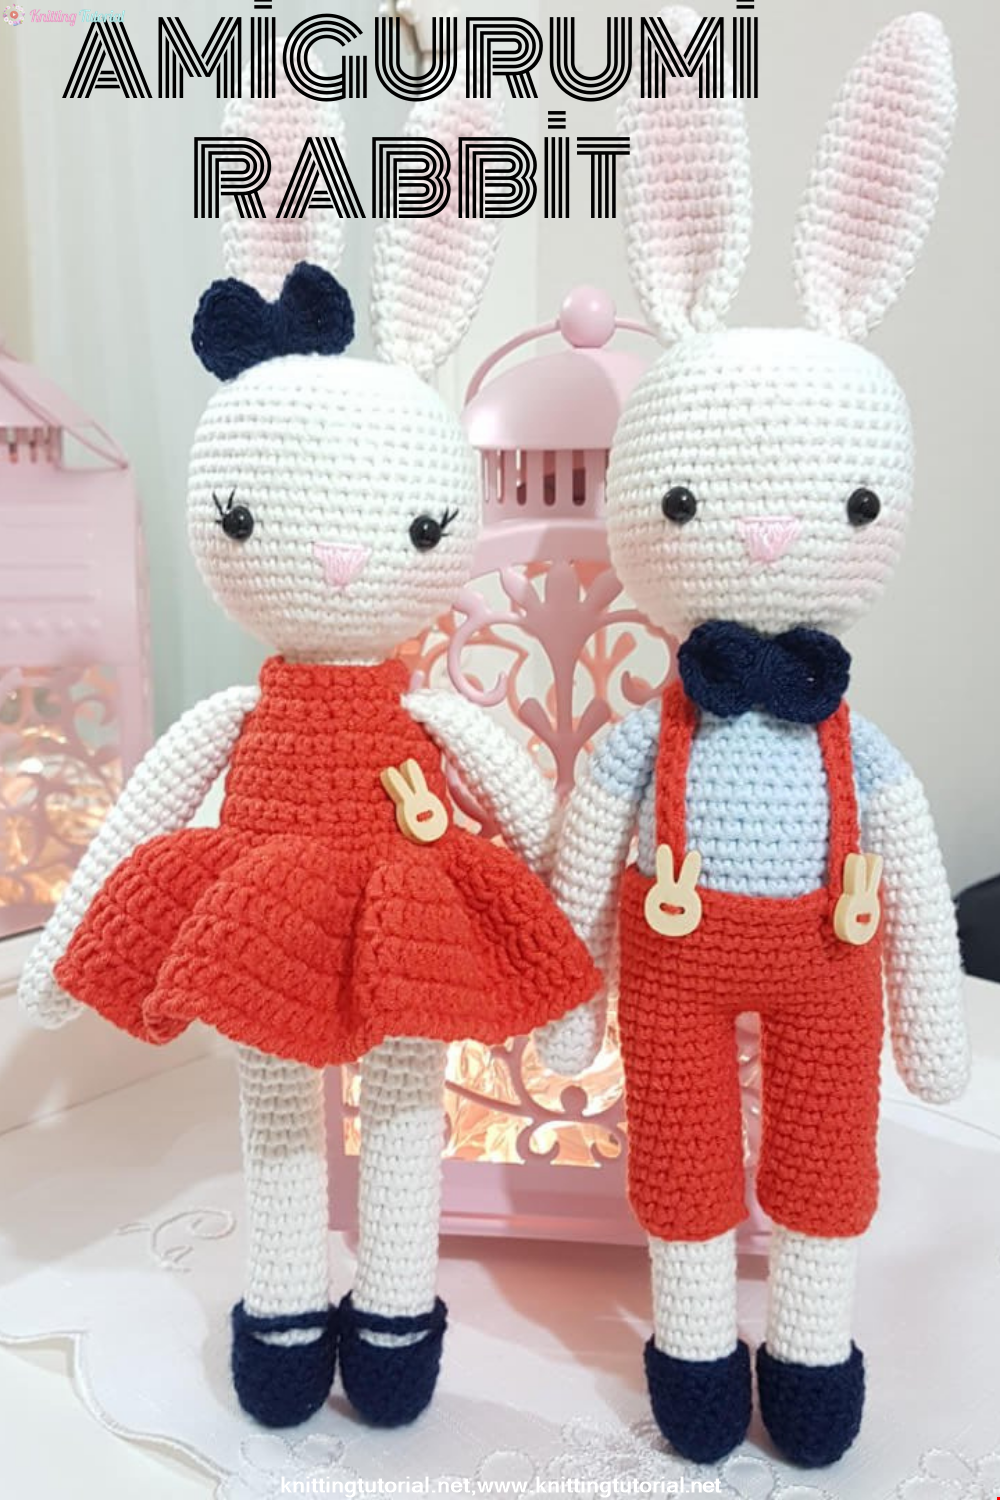
With this knitting pattern that even beginners can do, you can make knitting toys very easily.
Read More
Making a Glamorous Colorful Sweater That Everyone Will Love
15 January 2022, 20:30 728
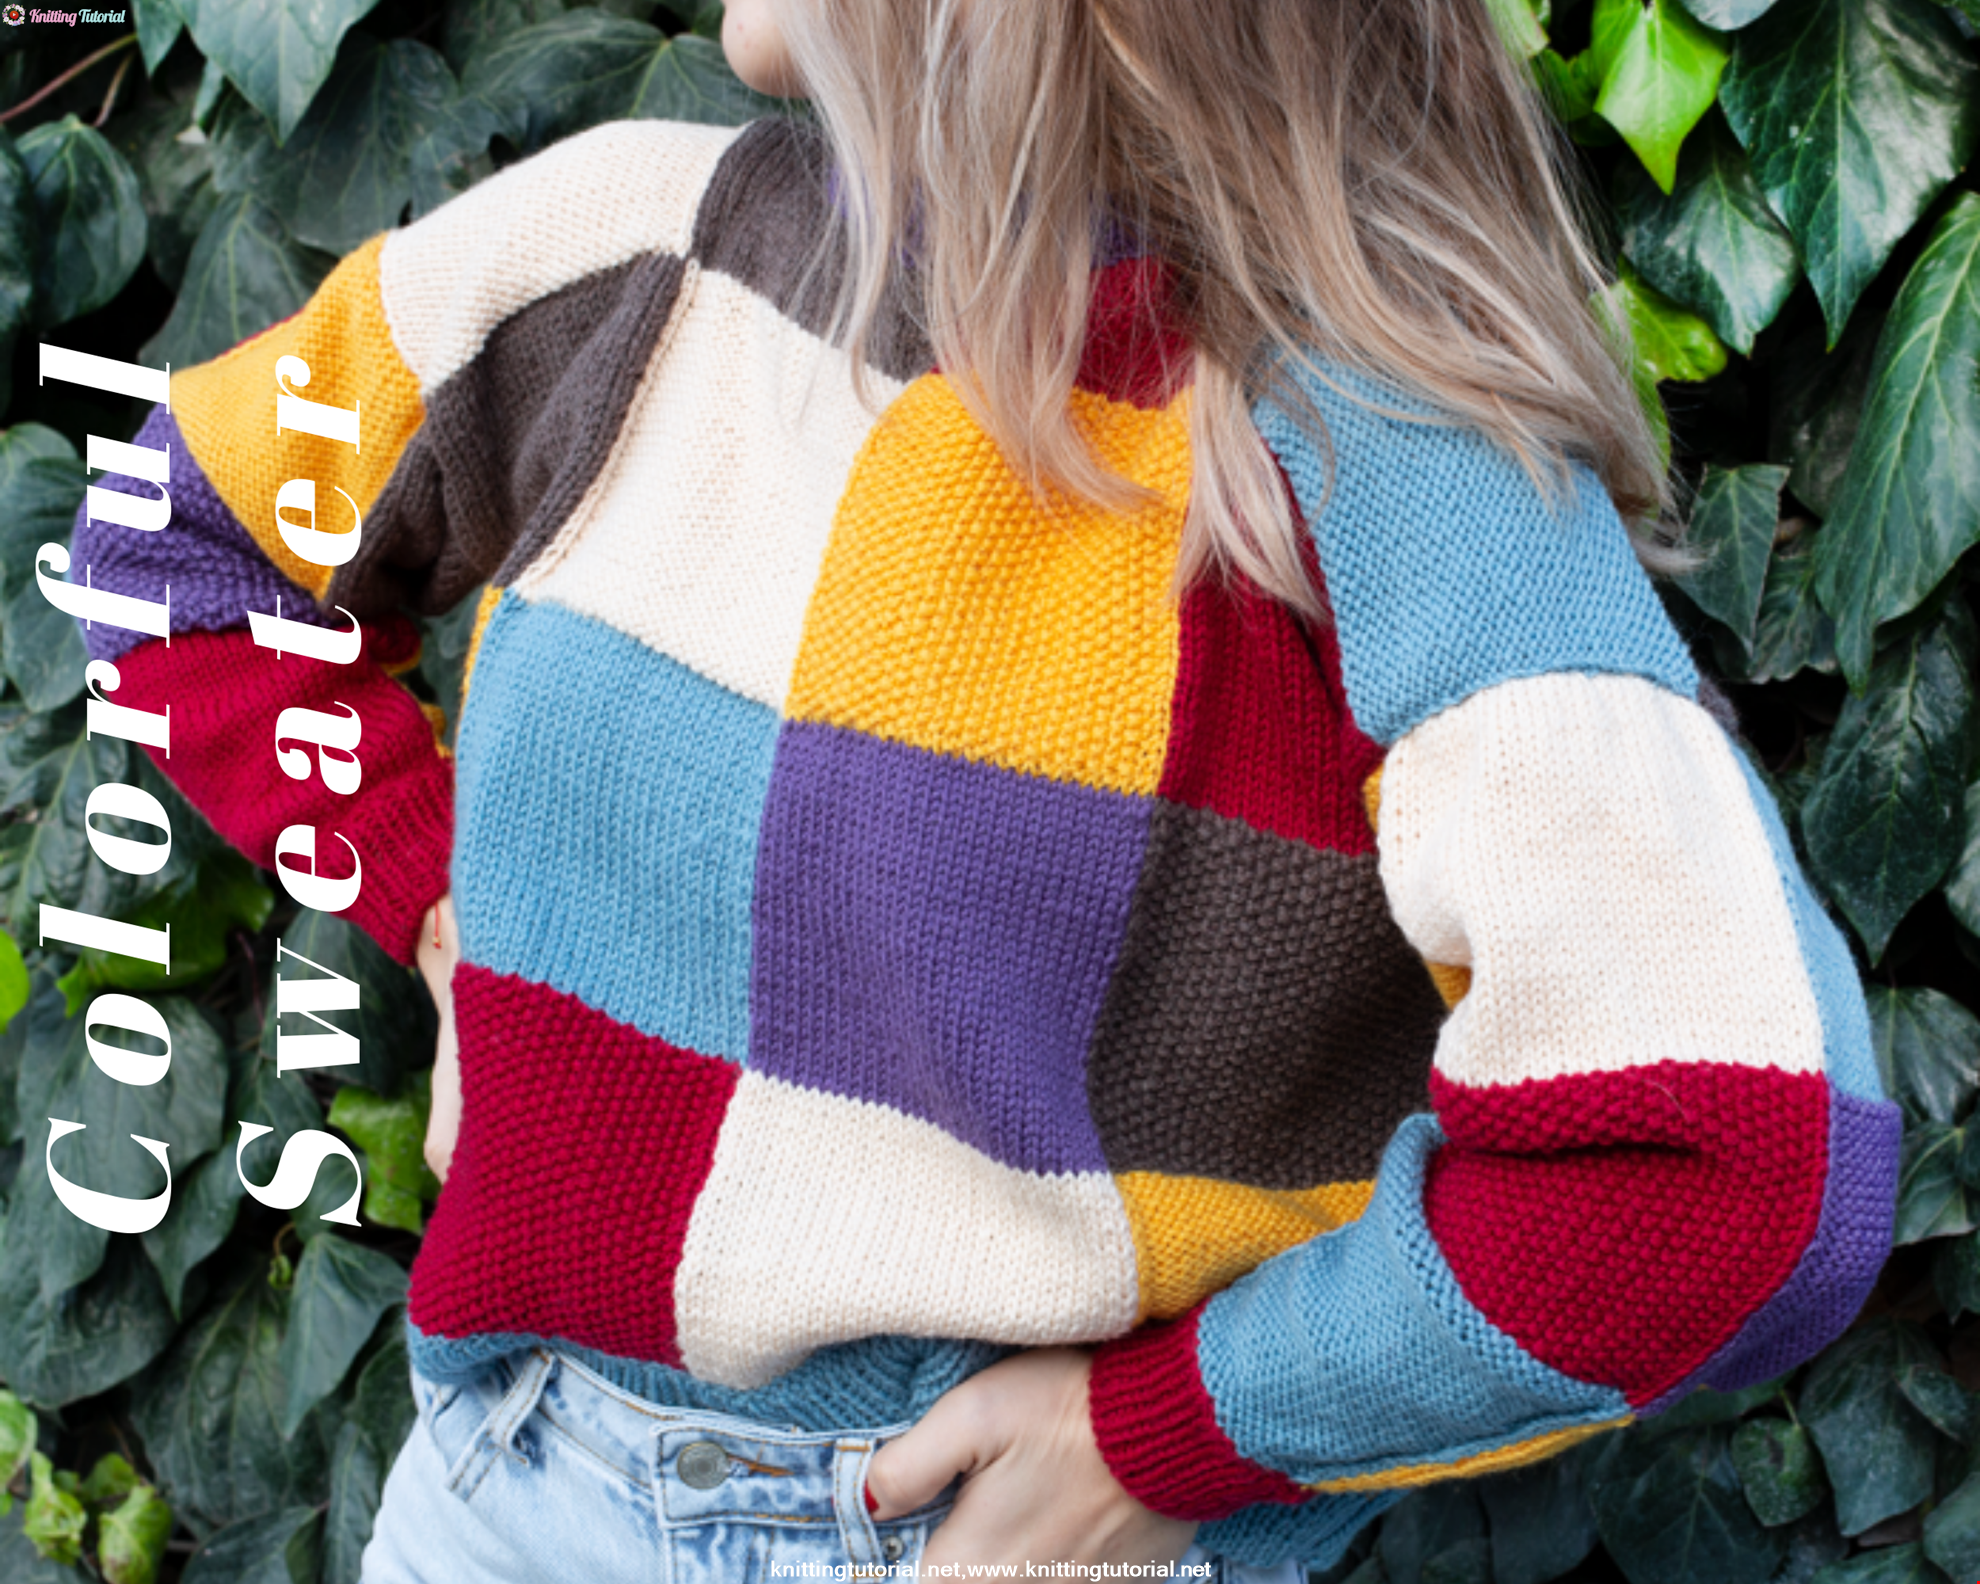
Hello everyone! Today we came with the recipe for making colorful sweaters. If you're ready, let's start!
Read MoreTeddy Bear Cup Cover Making and Recipe
15 January 2022, 21:46 739
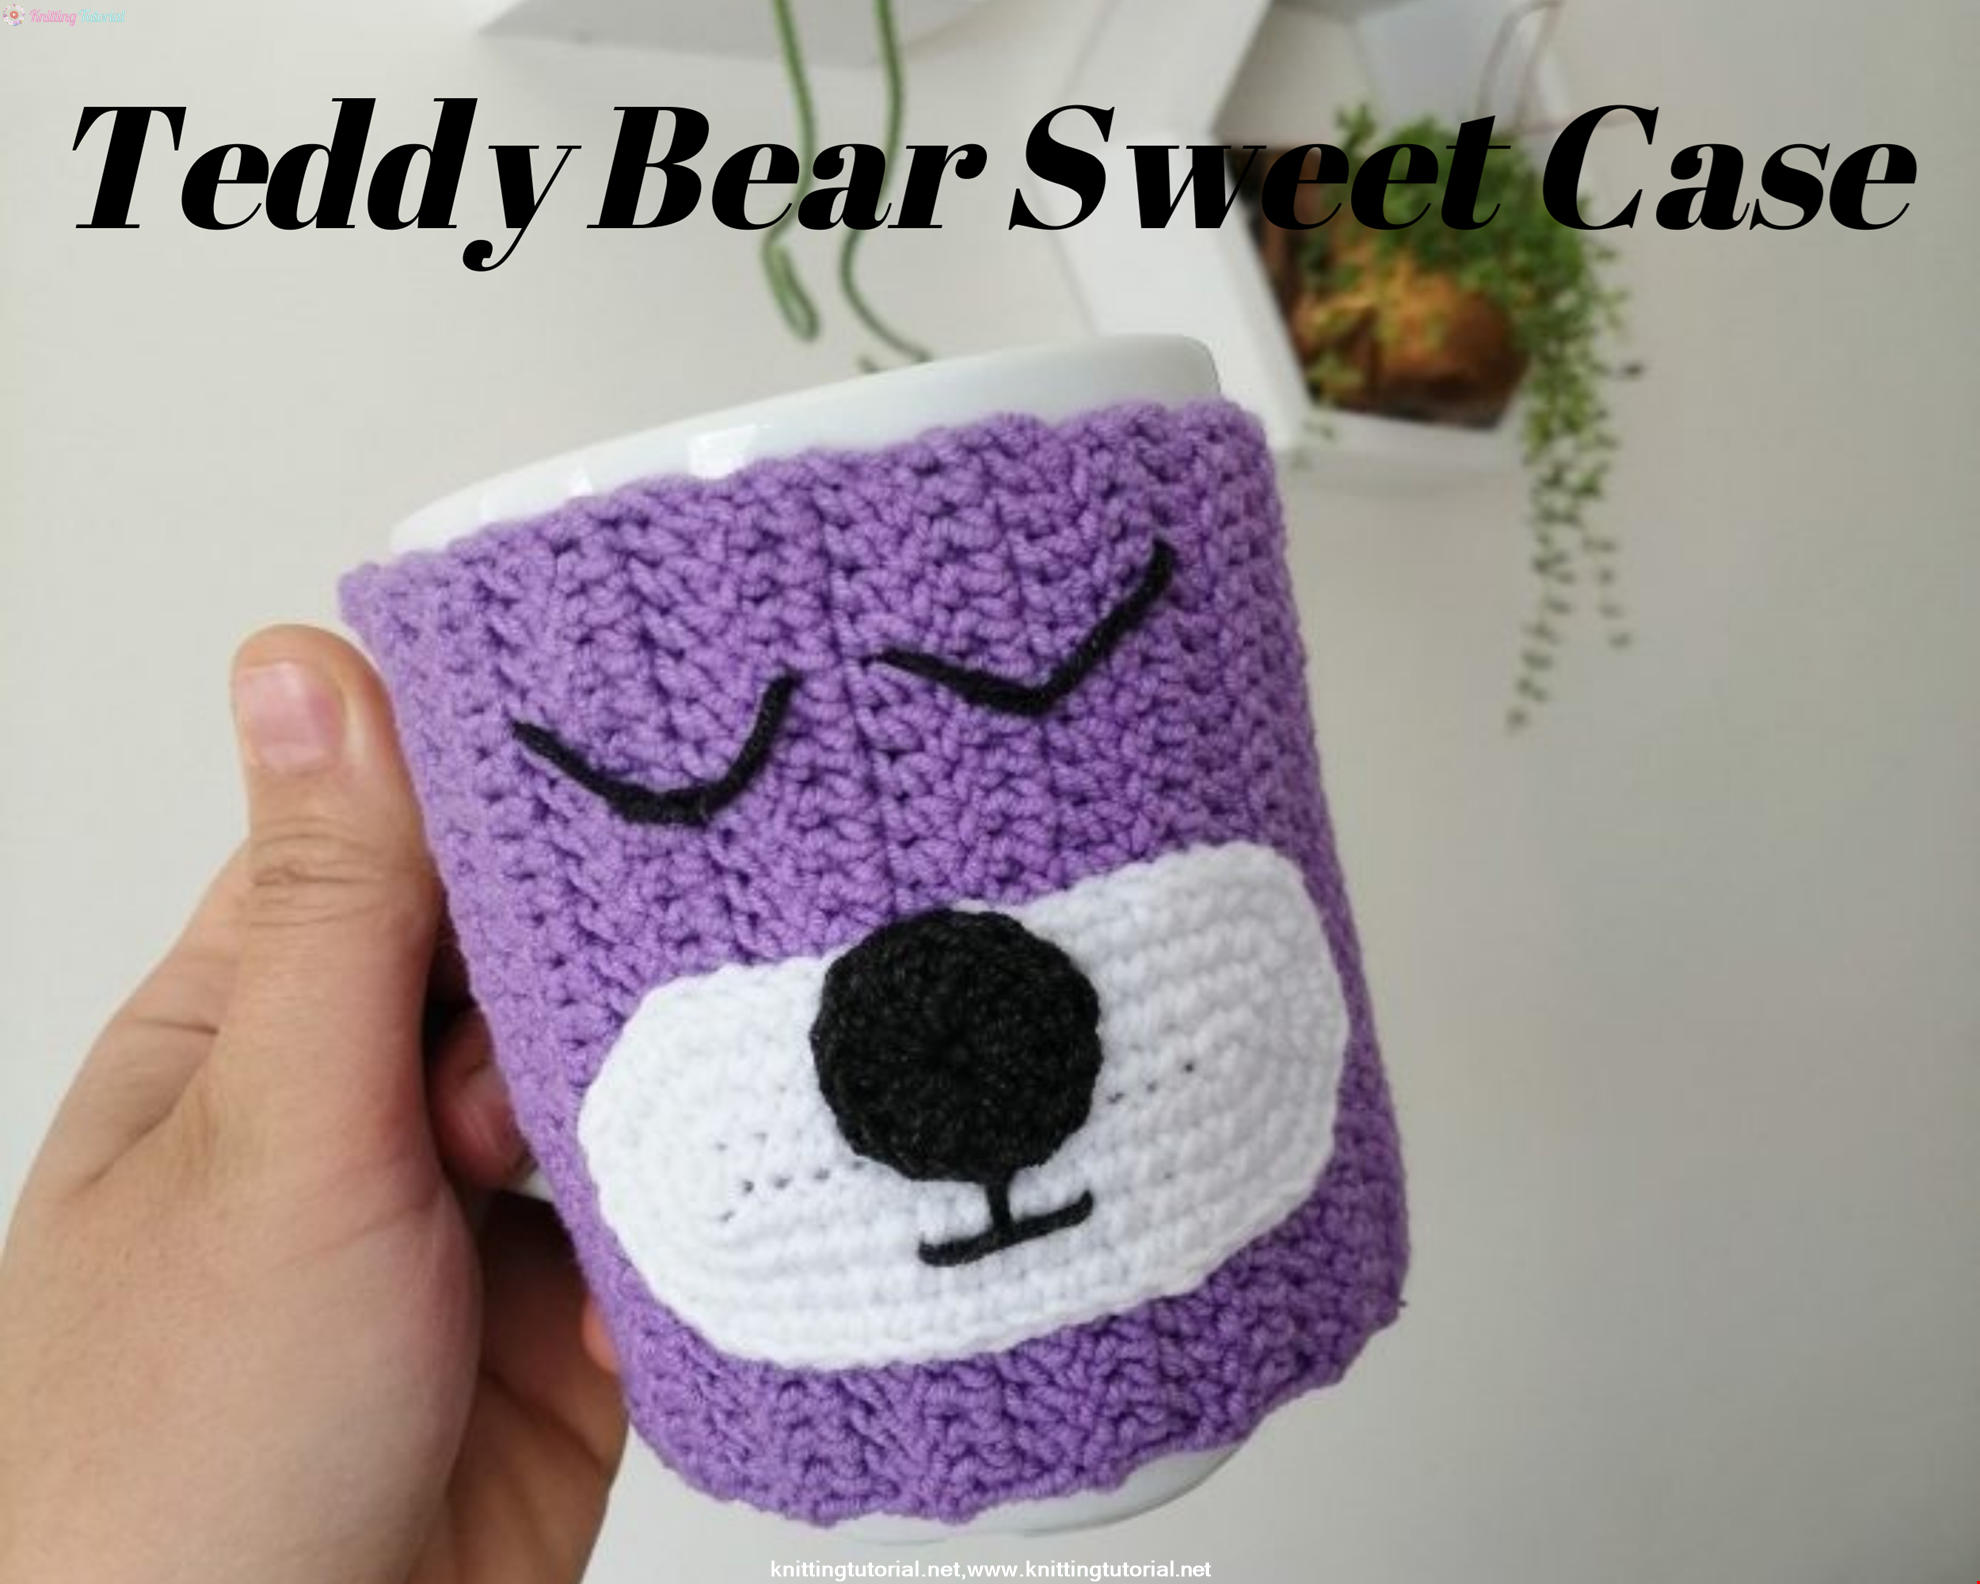
Hello! While it's winter, how about knitting a stylish teddy bear cup cover? Then if you're ready, let's get started.
Read More