Velvet Bear
5 November 2020, 10:21 607
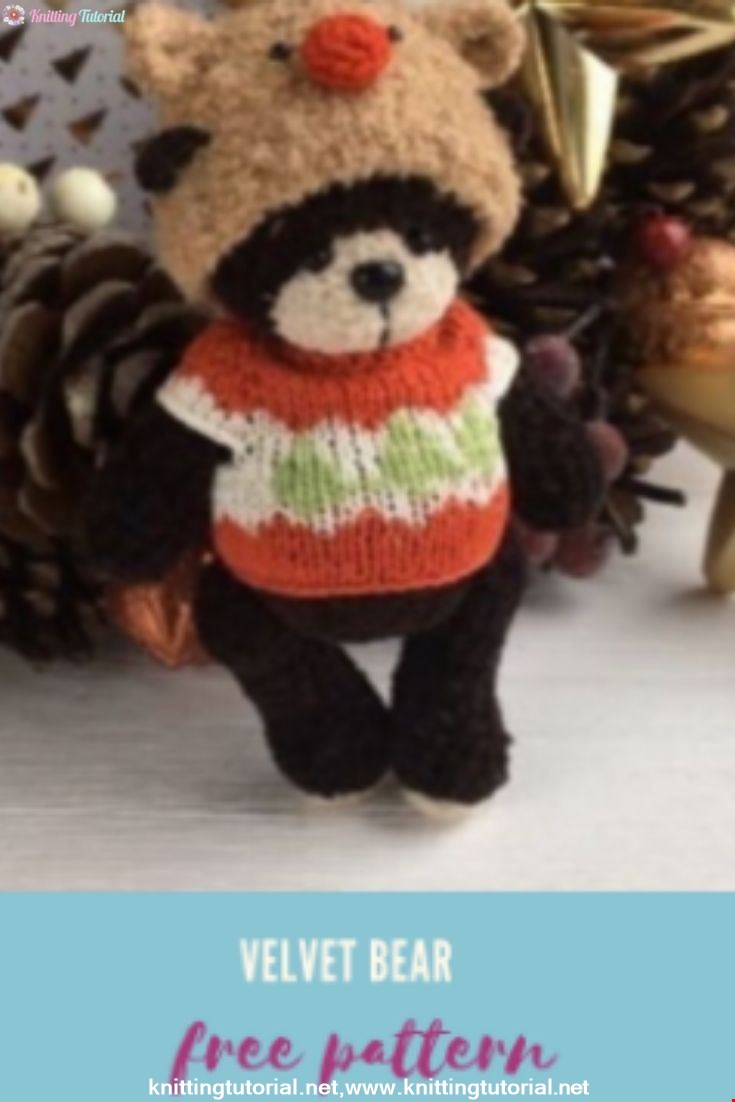
Materials Required:
🐻Yarn in two colors.
I used Velor Ice amigurumi .Brown and beige color.You can use any yarn.
🐻Filler.
The one you are using.
🐻eyes 2 mm.
It can be beads or eyes on a carnation.
🐻The nose is plastic.
You can embroider your nose, you can dazzle with polymer clay.
🐻hook suitable for the size of the yarn.
I used a 1.5 mm size.
🐻cotter pin and discs.
I used a 16 mm disk and a cotter pin 2.5: 2.5 for the head.
For neck and arms 12 mm and forelock 20:20.
🐻threads for tightening.
Materials for caps:
🧶yarn Flora Trinity or textured yarn.
🧶yarn red color For nose
🧶wire for horn 🧶beads 1 mm.
🧶Sewing threads for wrapping
🧶gel-based glue.
Materials for sweaters:
🧵cotton yarn, meter 180m per 100 grams of two colors.
🧵circular knitting needles 2.
🧵thread floss for embroidery on a sweater.
🧵Button for a sweater.
.
We start knitting with light yarn.
Head:
1. Dial 6 VP, start knitting from the second hook:
Pr, 3sbn, 4 sbn in one loop, 3 sbn, PR (14)
2. 1sbn, Pr, 4sbn, Pr, 1 sbn, Pr, 4 sbn, Pr (18)
3. Knit One row (18)
4. 2 sbn, Pr, 4 sbn, Pr, 2 sbn, Pr, 4 sbn, Pr, 2 sbn (22)
5. Knit One row (22)
Next row start from color change to primary (brown)
6.2sbn, 8 Ave., 12 prs (30)
7. (1 + Ave) * 15 (45)
8-13. Knit 5 rows (45)
14. (7 + yb) * 5 (40)
15. (6 + yb) * 5 (35)
16. Knit 1 row (35)
17. (5 + yb) * 5 (30)
18. Knit one row (30)
19. (4 + yb) * 5 (25)
20. Ub, 23 sbn (24)
Set the cotter pin between 10-11 rows .
21. (2 + ub) * 6 (18)
22. (1+ ub) * 6 (12)
Fill with filler, paying attention to the nose.
23. Knit one row (12)
24. 6 UB to the end.
Tighten the hole with a needle.
Ears
Dial 2 VP, loop the second from the hook, knit 6 sc, VP and turn.
2. (1 + PR) * 3 (9 SBN)
3. Fold the eyelet over the floors and make one stitch with a needle. Or knit one sbn with a hook.
. So you should get an ear in the form of a “dumpling”)))) 🥟
. We knit two identical ears and leave the thread for sewing.
Design:
1. Install needles for hooks. This is in a series of changes to the primary color. This is a 5-6 row. Between them.
.
Fix the thread in the head of the toy and perform two trimmings symmetrically. Fasten the fasteners near the cotter pin so that the bastings and threads are not visible.
.
2. Install the spout in the second row. Plastic nozzle on a secure mount. I stick it.
3. Thread in tone to embroider the middle of the face with two stitches.
4. Sew on the eyes in places of tightening.
Eyes can be used with beads (as in my case 2 mm) or on a clove.
.
5. Find the location of the ears. I fasten on a 4 straight row. According to the general numbering, this is the 11-12th row.
.
You can adjust the distance as you like.
.
6. Hide the tails of the ears in the head through an open hole.
7. Sew locks in the color of the eye, or black thread.
8. Make a head. You can embroider. Whites of the eyes and eyebrows.
.
In its version, the final. I removed the whites of the eyes and embroidered eyebrows to match the hats.
.
9. Add filler (if necessary) and close the knitting with a needle.
Body:
1. We collect 2 VPs, into the second loop (the first loop of the beginning) from the hook, perform 7 sbn and close in ring
2. 7 PR (14 p.)
3. (PR + 1 sbn) * 7 (21)
4-5. Knit 2 rows (21)
6. (PR + 2 PRS) * 7 (28)
7. (PR + 3 PRS) * 7 (35)
8. Knit one row (35)
.
Run cotter pins head mount. Install the disc and washer, tighten with a cotter screwdriver or round-nose pliers.
.
9.3 sbn, (PR + 1 sbn) * 7, 18 (42).
10-14. Knit 5 rows (42). 15. (5 sbn + UB) * 6 (36)
16. Knit 1 row (36)
17. (4 sbn + UB) * 6 (30)
18. (3 sbn + UB) * 6 (24)
19. Knit 1 row
Stuff the toy tightly, forming a convex tummy. When filling the toy, add each portion of the filler inside, in the center of the toy, then the toy will be evenly filled and will not lose its shape.
.
❗Do not close knitting if using cotter pin fastening! ❗
.
20. (2 sbn + UB) * 6 (18)
21. (1 sbn + UB) * 6 (12)
22. 6 UB (6)
23. Close the hinges with a needle.
Handles:
1. KA 6 sbn (6)
2. 6 * PR (12)
3. (1 sbn + PR) * 5 + 2 sbn (17)
4-6. Knit 3 rows
7. 7sbn, 2 UB, 6 sbn (15)
8. KNIT 1 ROW (15 p)
9. 6 sbn, 2 UB, 5 sb (13).
.
FILL THE BEGINNING OF THE HANDLE TIGHT.
.
10. UB, 5 sbn, UB, 4 sb (11) 11. UB, 9 sbn (10)
12. UB, 8 sbn (9)
13. UB, 7 sbn (8)
14. Knit one row (8)
.
Having retreated one row to the bottom, install a disk with a cotter pin. Remembering that there is a right and left handle. The bulge of the arm should look forward.
.
The hand should be full to the cotter pin, the fillers do not need more.
15. (1 + ub) * 2, 2SBN. (6)
15. Knit a row and close the hole with a needle.
Legs:
1. 2 VP, in the second loop knit 6 sbn (6).
2. PR * 6 (12)
3. (1 SBN + PR) * 6 (18).
4. (2 SBN + OL) * 6 (24).
5-6. Knit 2 rows (24)
7. 8 sbn, 4 UB, 8 sbn (20)
8. 7 sbn, 3 UB, 7 sbn (17). 9-10. Knit 2 rows (17)
11. UB, 15 sbn (16)
12. UB, 14 sbn (15)
13. UB, 13 sbn (14).
Fill the part with hollafiber
14. UB, 12 (13)
15. UB, 11 (12)
16. UB, 8, UB (10)
.
Having retreated one row at the bottom, insert the cotter pin with the disk in the center. Remembering that there is a right and left leg.
.
17. (1 + ub) * 3, 1 sbn (7)
18. Knit one row (7)
Close the knitting with a needle.
Tail:
1. Dial 2 VP, in the second from the hook tie 6 sbn.
2. 6 PR (12)
3. Knit 12 sb.
4. 6 Ub
Add filler if yarn allows.
.
A post with assembly will be tomorrow. Then the tail will be sewn.
Assembly:
.
1. We set the arms and legs on the cotter pins.
2. Hands set between 6-7 next to the body.
For symmetry, install one hand, flatten the body in the area of the cotter pin entry – this will find the second side.
For a hand to take a disk 8-10mm. And tighten the cotter pin. If you have a wooden disk, then the puck is still needed.
3. Set the legs in the 18-19th row, ie between two given rows.
The disk for the foot is required in size 8-10mm.
Close the cotter pin, as on the handles.
4. Stuff the toy tight, paying attention to the tummy.
5. Close the knitting, as indicated in the post about the body.
6. Sew the tail, half-looped to the body.
7. For decor, you can knit heels of beige color (as the beginning of the muzzle) and sew to the leg.
Heels:
1. Dial 4 VP, knit the second from the hook:
Pr, 4 sb in one loop, pr (8)
2. Pr, 3 sb, Pr, 3 sb (10)
3. Knit one row in a circle.
4. Leave a tail for sewing
5. Sew a heel to the bear’s foot.
.
As a complement to the design of the bear, you can do the ducking on the hands. Contrast color. Or add with a knitted beige to the belly. .
You can supplement with anything you like.
Beanie:
1. Dial 2 VP, in the second from the hook, knit 6 sc.
2.6 PR (12)
3. (1 + PR) * 6, (18)
4. (2+ PR) * 6, (24)
5. (3 + OL) * 6, (30)
6. (4+ OL) * 6, (36)
7. (5 + OL) * 6, (42)
8. (6 + OL) * 6, ( 48)
❗In this case, adjust the increase in the size of the head, it should be 6 loops larger than the head. In my mating. 3 loops more, knitting the fabric stretches in this yarn. This also needs to be taken into account! ❗
9-11. Knit 3 rows.
12. In this row, the number of loops does not change, but it is necessary to knit “holes” under the ears. This can be done with air loops. I had 4 air loops. The distance between the ears -16 sb. This is in my case, you may have less or more.
13. We knit a row without increasing the number of loops, but the air loops are tied, plant. chain hook.
14-15. Knit two rows and close the knitting.
Adjust the depth of the cap according to the size of your toy.
.
🦌Nose for a hat : 1. Yarn red, dial 2 VP, in the second from the hook, knit 6 sc.
2. 6 PR (12)
3. Knit 1 row (12)
4. 6 UB.
Leave a ponytail for sewing. If necessary, fill with filler.
.
💡Ears for hats:
.
1. Dial 5 VP, in the second knit from the hook:
2 PRS, 4 in one, 2 PRS, VP and turn the knitting. (8)
2. 3 sbn, 2 pr in a row, 3 sbn (10)
3. Close the knitting, leave the tail.
4. Sew the lower edges of the eyelet on one column and sew to the cap.
.
Horn 🦌:
.
1. Bend the copper or steel wire into an arbitrary force, the one that suits you.
2. Lubricate the workpiece with glue and wrap with matching sewing thread.
3. Sew to the cap, between the ears.
.
❗sew all the details to the caps and sew the beads for the eyes. Bead 2 mm.
.
❗Your hat is ready !!!!! Try on a bear 🐻.
Sweater:
1. Type 38 loops on two knitting needles for stocking.
2. Knit two rows of facial loops.
3. Next, we divide our loops into 4 sections: the first and last loops are edge. We don’t count them at the moment. We need them to make sweaters.
8 front loops (one of the backs), Pr, 2 front loops, Pr, 16 front loops (front), Pr, 2 front loops, Pr, 8 front loops (second back)
4. Knit all the wrong loops.
Further knitting goes on the same principle, the front rows are increased by 4 loops. Between the increases, a section of the sleeve is formed.
5. Knit to the desired length to form a sleeve.
6. Closing the loop of the sleeve on the front side of the knitting.
7. On the wrong side, dial the same amount that was closed on the sleeve, only 2 loops less.
8. Further knitting continues to the length that is necessary for the sweater.
.
Color change can be arbitrary. How do you like. Shreds are embroidered on loops of thread floss.
Category Popular Posts
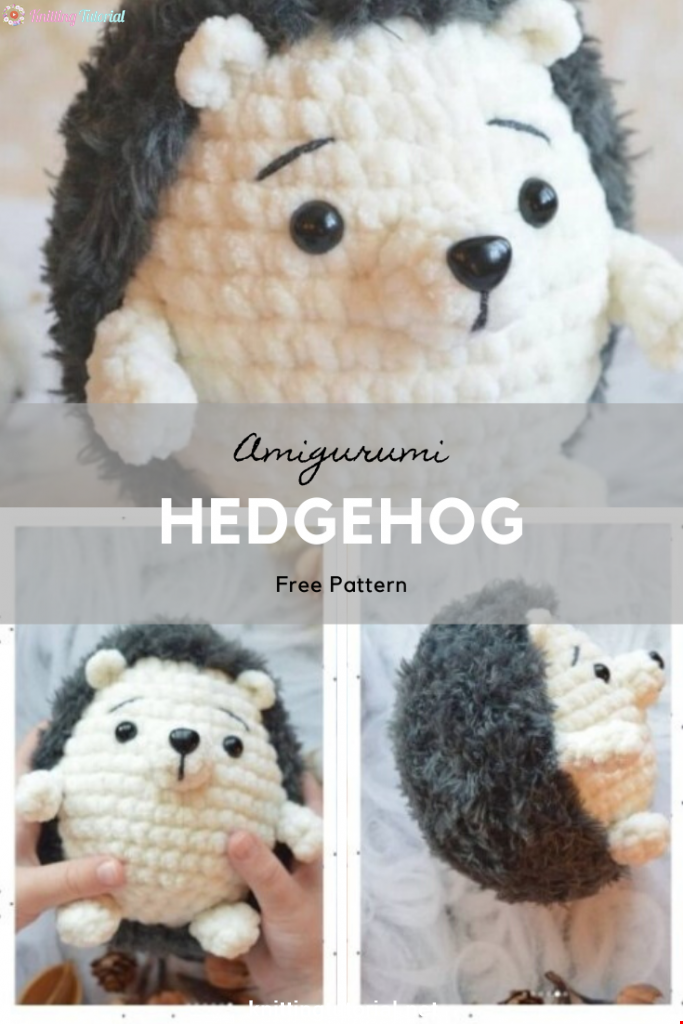
Amigurumi Hedgehog Free Pattern
12 October 2020, 09:52 11505
Making Amigurumi Spiderman
27 January 2022, 20:58 2024
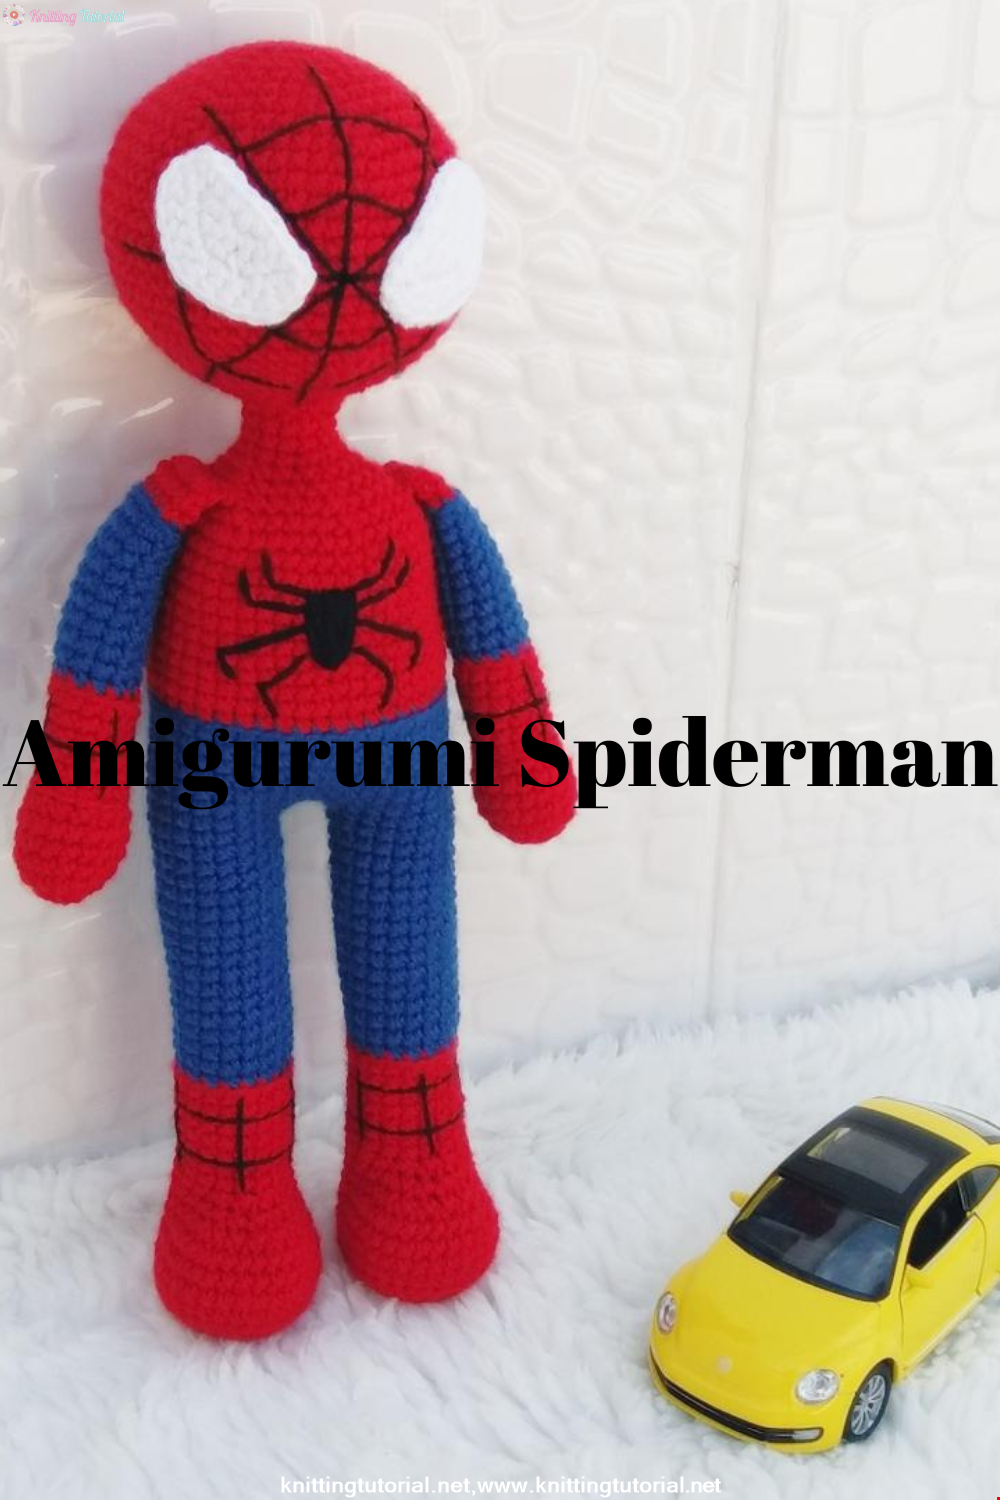
Hello, Are you ready to knit Spiderman, Spider-Man, the children's favorite cartoon character? You will be able to knit easily with detailed explanation. Let's start!
Read More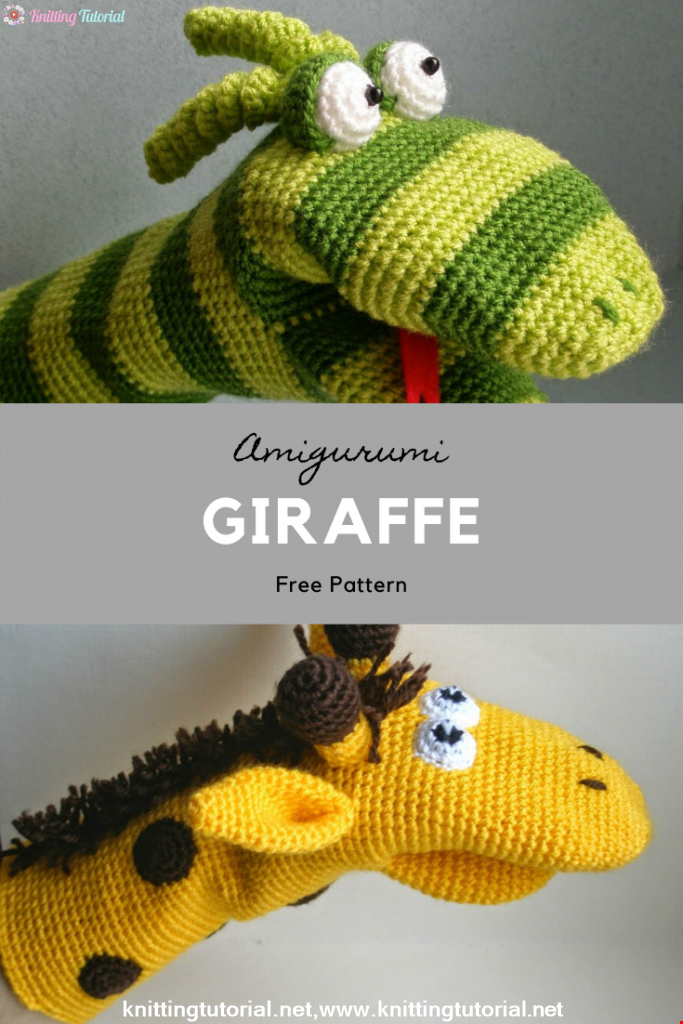
Amigurumi Princess Mononoke Crochet Pattern
12 December 2020, 21:20 946
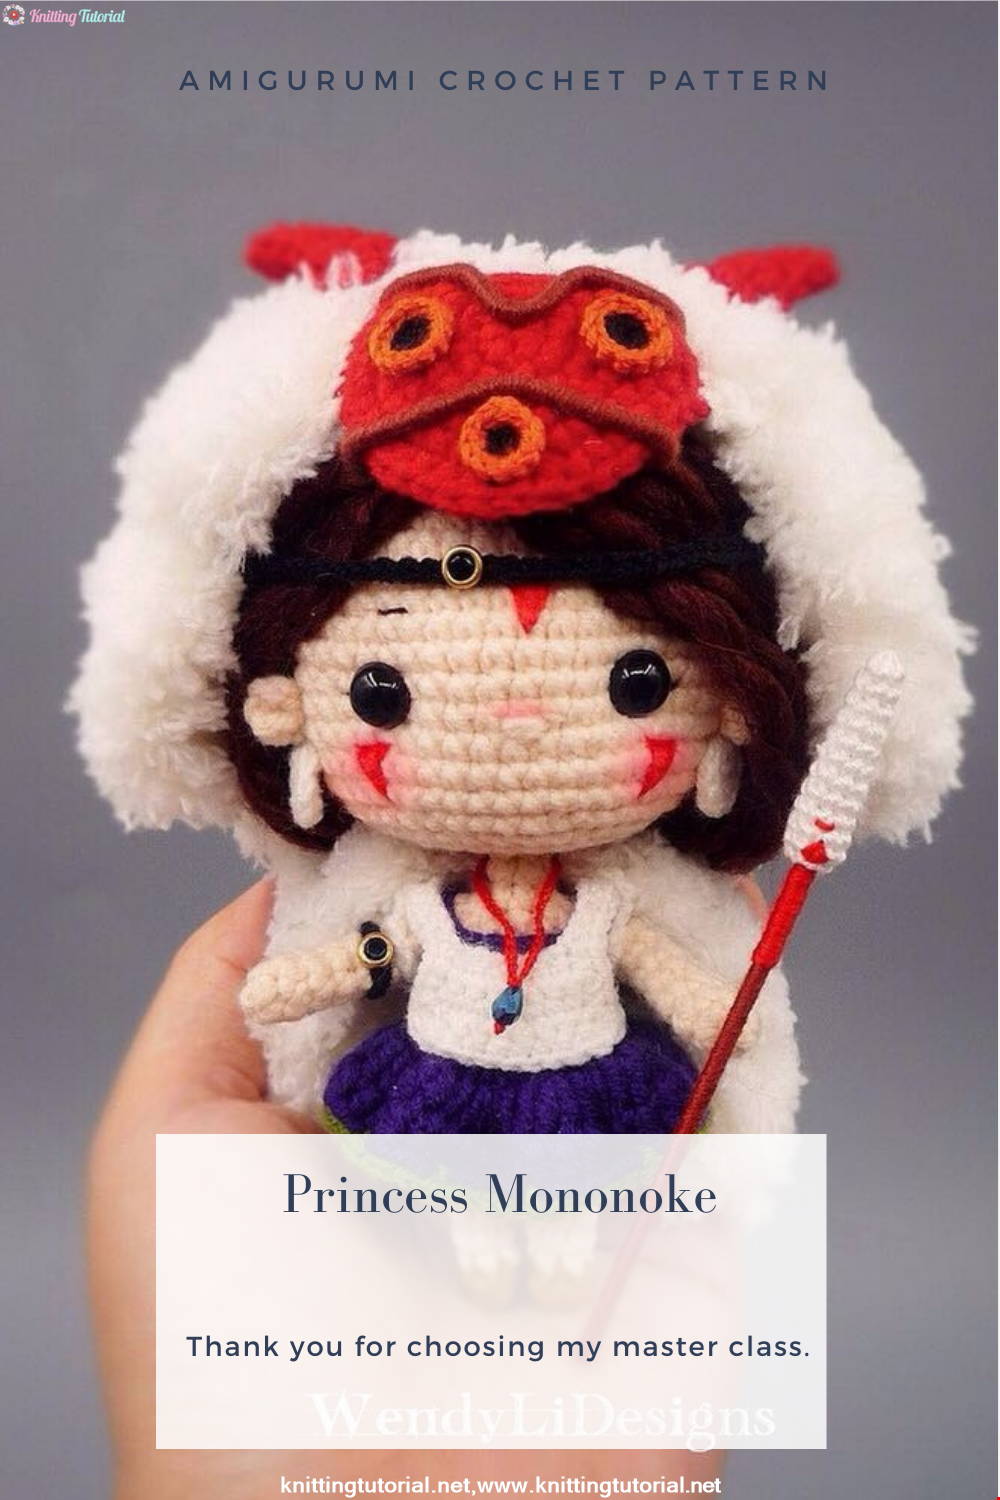
Free Crochet Princess Mononoke workshop by Wendy Li. The knitted girl is the hero of the cartoon by Hayao Miazaki. From the description of the diagram, you will also learn how to knit: a cape, a cloak, a dress and a mask for a doll.
Read More
Princess Disney Amigurumi Pattern
8 October 2020, 14:51 5815


Korean Girl in Traditional Dress (Hanbok)
22 September 2020, 11:11 1573

This is the process how I made the amigurumi of Korean Bride in traditional dress Hanbok. Lately I've been watching a lot of Korean dramas and got inspired to make one. I hope you can enjoy the video, and get inspired too!
Read More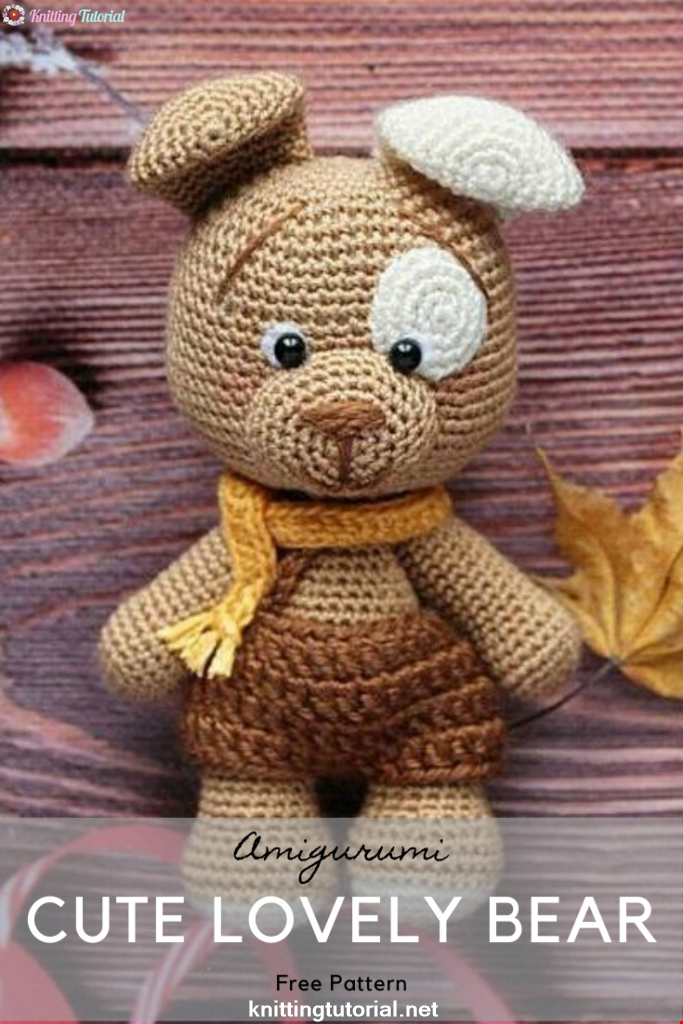
Amigurumi Sweet Giraffe Recipe and Preparation
5 January 2022, 14:55 634
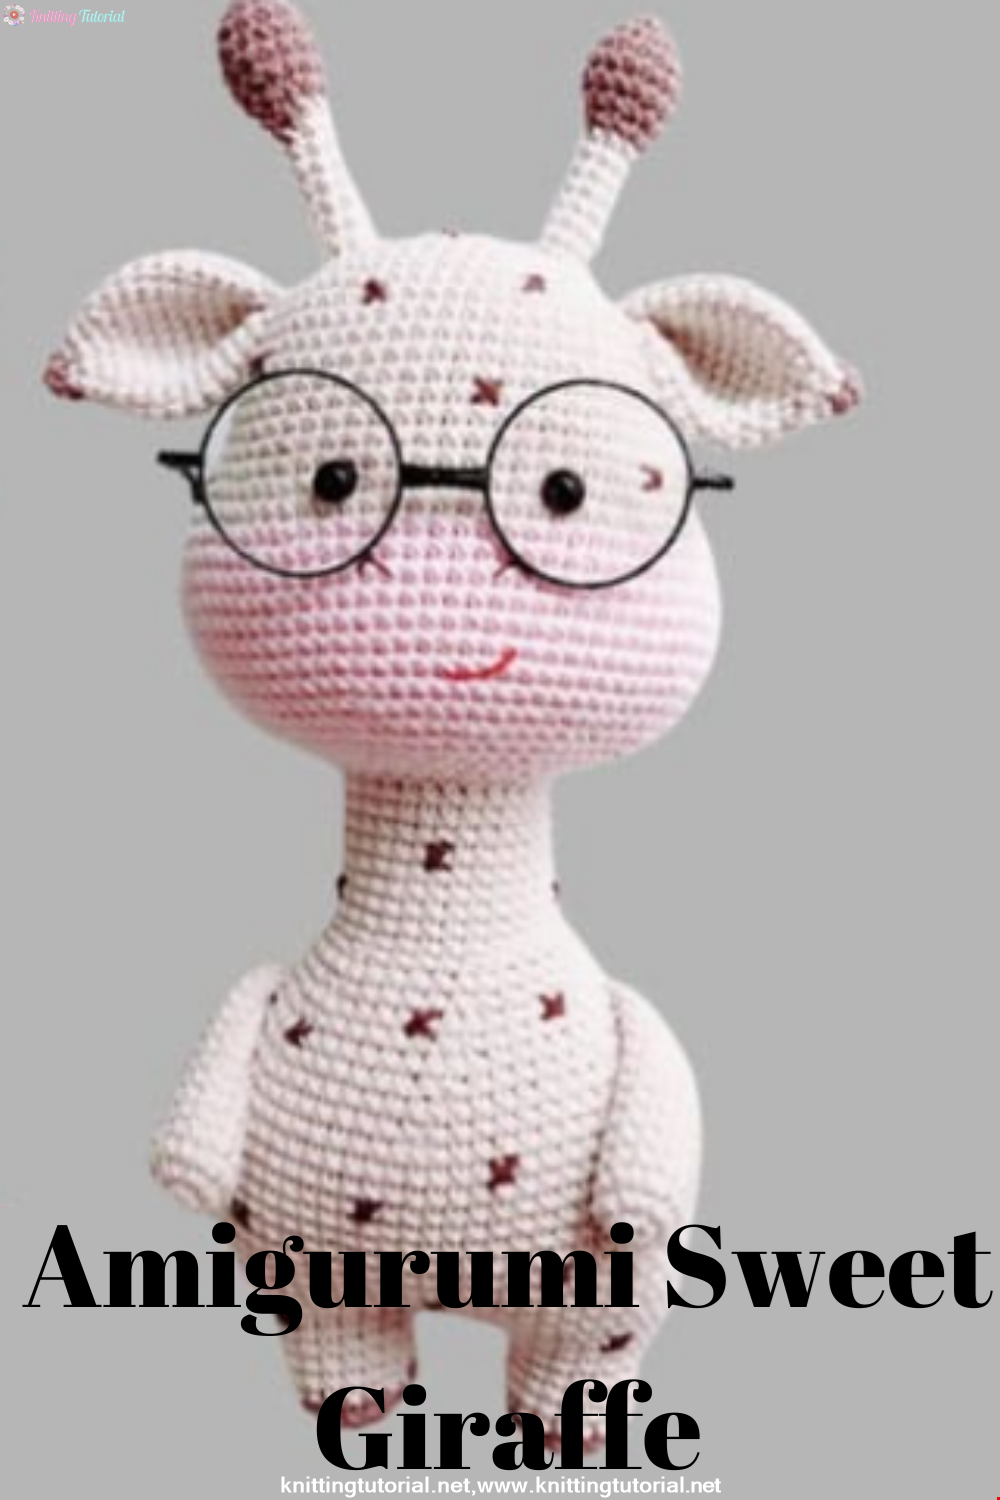
We have come to share with you the most popular model of recent times with the Amigurumi sweet giraffe recipe. I hope it will be an amigurumi animal figure that you like very much and knit with love.
Read MoreLovely Teddy Bear Amigurumi Tutorial
12 October 2020, 10:05 2969